What Smoke Coming From Your Vehicle’s Tailpipe Means

When everything is working the way it should, there should be no visible emissions coming from the exhaust pipe of your car. If you see smoke, it’s likely a sign that something in the engine is wrong. But did you know that the color of the smoke can point to the cause of the problem?
Here are the four most common colors of visible tailpipe emissions, as well as a rating of how dangerous they are for your engine.

4. Wispy White “Smoke” When You Start Your Car

If you suddenly notice that something looking like white smoke is coming from the tailpipe of your car, you may not need to worry just yet. As long as it’s relatively thin and goes away within a few minutes of starting your vehicle, chances are it’s not smoke at all, but water vapor. When your car sits outside, especially overnight, condensation can build up inside of the exhaust system. Starting your car will warm that condensation, turning it into steam. As the exhaust system warms up, the condensation will disappear, and the white steam along with it.

3. Black Smoke

If your exhaust pipe is emitting black smoke, it’s likely because the fuel/air mixture is too rich. In order to combust properly, your engine needs a precise mixture of fuel and air. The mixture is “rich” when it has too much fuel or too little air. If this is the case, you’ll probably need to take your Subaru to an authorized service center. There are a number of things that could cause a rich fuel/air ratio, including clogged fuel injectors, a dirty engine air filter, or the fuel-pressure regulator. These problems likely won’t put your engine in immediate danger, but they certainly can take a toll.

2. Blue or Grey Smoke

If the smoke from the exhaust pipe is either grey or bluish-tinged, it generally means that your engine is burning oil inside the combustion chamber. Burning oil could be due to a number of causes, from leaky valve seals to bad piston rings. While the cause itself may not put your engine in immediate danger, it could be a sign that the engine itself is nearing the end of its lifespan. What’s more, it also means that your oil levels are most likely being depleted. If the oil isn’t regularly topped off, it could lead to massive engine damage.

1. White Smoke

Unlike the white condensation that’s generally totally benign, plumes of white smoke billowing from the tailpipe are a sure sign of trouble. It usually means that coolant is being burned in the engine, which means that something is drastically wrong. The most common cause of this is a blown head gasket, which can quickly lead to an overheating engine. But it could also be due to a cracked cylinder or engine block, making it necessary to replace the engine entirely. If you see this kind of smoke, pull over and turn off the engine as soon as you can, and then call for a tow truck.

Tips To Keep Your Car Sensors In Good Condition

The sensors in your car are a safety feature; they help you maintain good driving habits. By keeping your car sensors in good condition, you can avoid unnecessary damage to your vehicle and even to you and your passengers.

For example, if the airbag failed to deploy during an accident, this could cause serious injuries or even death. To prevent this situation, you have to keep your car sensors in top condition.

1.Diagnose Electrical Problems

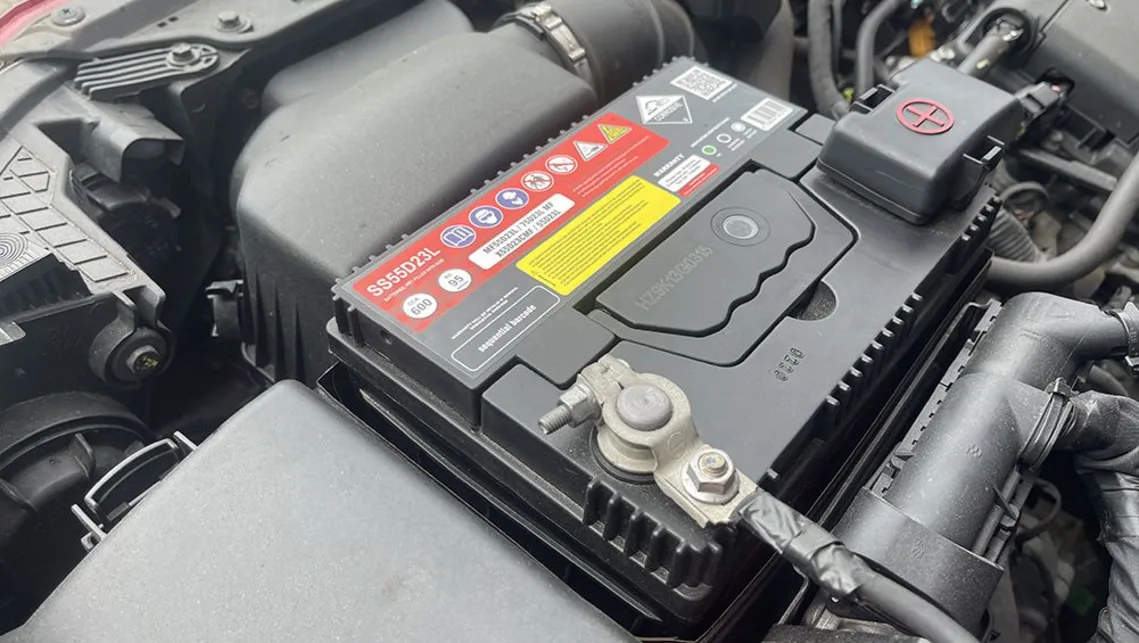
The first thing you should do is to diagnose an electrical problem as soon as it occurs. If your car runs rough or doesn’t start or runs rough, the battery is likely weak and needs to be replaced.

If your vehicle starts but doesn’t run smoothly after that, the problem can be with the starter or alternator.

When diagnosing a loose battery connection or a faulty fuse, it is good to test each individually. You may use jumper cables to test for shorts between two points on the circuit board. If this doesn’t work, you have to go through more troubleshooting steps until you find out what’s wrong with your car.

2. Check The Battery Cable Connections

Next, you should check the battery cable connections on the ground and underbody of your vehicle. This will allow you to know if one of them is loose and causing issues with starting your car.

If you notice that they are all okay, replace them with new ones after checking out their condition to see if they are old or damaged.

3. Clean Regularly

Another thing you should do is to always clean your car sensors. Doing this can remove dust and dirt, which can cause issues with the sensor’s ability to function correctly.

You can use a soft cloth or cloth diaper to wipe down the surface where the sensor sits. You should also ensure that there are no dirt particles or oil on the surface. If any residue is left behind from previous cleaning attempts, you might want to do one more attempt before moving on to something else.

4. Not Leave The Sensor In Direct Sunlight

Sunlight is harsh on electronic devices, especially car sensors. If you leave your car outside for long periods, the ultraviolet rays will damage your car’s sensors. For example, it might cause an anti-lock braking system to stop working correctly or a cruise control system to slow down or stop altogether.

If you want to keep your car sensor in good condition, you should avoid leaving it in direct sunlight. Instead, park your car under a shady tree or inside a garage to prevent damage from occurring.

5. Keep An Eye On Your Car’s Oil Level

Keeping up with your car’s oil level is essential because it can affect how well your car sensors work. If there are too many contaminants in the oil, it can damage the sensors and make them less effective at detecting obstacles. The same is true if there isn’t enough oil in the engine. An overfilled machine can have the same effect on your car’s sensors as a small amount of contamination in the oil.

Thus, you must check your car’s oil level regularly and monitor how much it drops. If it keeps dropping, the sensor may be wrong, and you should take it to a mechanic immediately.

6. Adjust Sensor Alignment

If your car’s sensors are misaligned, it can cause issues with the system. Also, they will need more time to pick up on vibrations. This can affect the performance of the airbags and seat belt tensioners.

The sensors are aligned by adjusting the sensor bracket on each side of your car. To change the sensor brackets, you’ll need to remove them from the vehicle and rotate them in either direction until they are flush against each other. Once you have adjusted them, replace them into your car and then test drive to ensure that everything works correctly now that they’ve been aligned perfectly.


5 SIGNS YOUR CAR NEEDS AN ALIGNMENT

Cars require upkeep, it’s just a fact.  Sometimes it can be hard to notice when something is off with your car, other times it’s very obvious.

When your car’s alignment is off it’s usually pretty easy to determine that’s what is going on. It often changes slowly and becomes out of line, but can happen suddenly. The main culprits are sudden jarring, like going over bumps and potholes or hitting a curb, and regular wear and tear of the components inside your car.

If you think your wheel alignment is off, here are some things you can check for.

1. Your steering wheel isn’t centered

If you’re not turning, your steering wheel should sit pretty close to perfectly straight and centered. If you’re not sure, look at your car emblem on the center of your wheel. If that looks crooked then your alignment is off. If you notice that the wheel is off center by more than 2-3 degrees in either direction, then your car is likely due for some maintenance.

2. Your vehicle pulls to one side or the other

Try driving straight down a road with no bends or curves. Does your car want to pull one way or the other? When testing, don’t take your hands completely off the steering wheel. There is a common misconception that the vehicle should drive perfectly straight with your hands off. In reality this isn’t the case because all roads have some degree of crowning which causes a slight pull to one side. Completely removing your hands from the steering wheel is also very dangerous. So keep hold of the wheel and just notice if you have to use one hand more than the other in order to keep it straight.

3. You notice abnormal tire wear in certain spots

Tire wear patterns can provide a lot of useful information about the condition of a car. The differences in wear patterns can indicate a misalignment in different areas of your car. Tire wear can most easily be seen by a mechanic when your car is getting a tire rotation or an inspection performed during a service. But it doesn’t hurt to check yourself and see if you notice any uneven wear on your tires.

4. The handling feels loose

If the steering in your car feels a little loose or unstable, one of the possible causes is poor wheel alignment. A loose wheel feels wobbly, like your car isn’t exactly going straight, it wanders slightly requiring small corrections from the driver. If you notice this issue get you alignment checked as that’s likely the cause of the problem

5. The steering wheel doesn’t return to center

After a turn the steering wheel should naturally want to return to center on it’s own. Of course you need to keep driving to actually make the turn, but if you notice your steering wheel doesn’t even attempt to move itself back to center, then it’s a good indication that your alignment is off.

5 Tips to maintain your car radiator

Have you ever been in stop-start traffic with an overheating car? If you answered yes, then you’re not alone. Maybe you skipped your last car service that was due, and so your vehicle may be in dire need of a car cooling system service? Whatever the case, the best way to deal with a situation like this is to turn your air conditioner off and open all your car windows. You want to give your engine less work to do.
 5 tips to help maintain your radiator
The same applies to your old car that may struggle up a hill and show signs of getting hotter than normal. You want to try to relieve the strain on the engine so don’t push your car too hard or rev it too much. Slow down or stop completely if you can. The harder your engine needs to work the more heat it will produce and then your vehicle ends up overheating. It goes without saying of course, that not getting yourself into these stressful situations in the first place is key. So be sure to visit your one-stop auto repair shop in Marietta to get your car service done regularly. You can also follow these are 5 maintenance tips to keep your radiator functioning optimally:
1. Always use the right coolant 
Only use coolants specific for your make and model of car, and don’t mix coolants. The requirements for aluminum and copper-brass radiators may be different and the usual coolant may not suffice.
2. Regularly flushing your radiator 
Every 12 months or 30 000 km’s a radiator flush and engine coolant replacement will remove the build-up of rust and residue and keep your radiator working properly.
3. Maintain the hoses and check for leaks 
Look for leaks and cracks in your radiator hose every time you change the oil in your car. Check also for rusted clamps and make sure your gasket that’s fitted to your radiator cap is still ok. Look for visual signs of leaks or drips under the engine.
4. Fluid check 
Maintaining proper levels of coolant is vital. It will not only stop your car from overheating in hot weather but also stop fluids from freezing in very cold climates.
5. Don’t overload your vehicle 
The heavier the load your vehicle needs to carry, the more your radiator needs to work to cool your car down. Overloading is a major factor in your car overheating as the load on the engine is increased and thus puts your car under extra stress.

How to change automatic transmission fluid and filter

Vehicles’ vital fluids normally perform two important functions: lubricating and cleaning. As the fluid circulates through the parts, it gathers the dirt and metal shavings that can accumulate over time. If you’re lucky, this debris will settle on the bottom of the pan or housing and not circulate through the system. That’s why some auto shops use machines that perform a transmission fluid flush, ensuring that more of this debris is removed before any new transmission fluid is poured into the vehicle.

Nothing prolongs vehicle life more than regular fluid changes. In automatic transmissions/transaxles, the recommended service interval is about every 30,000 miles or 30 months. (Check your owner’s manual or service manual for your car’s specifics.) The automatic transmission fluid (ATF) should be changed sooner if its dipstick reveals dark or burnt-smelling fluid.

DIY transmission fluid and filter changes

Even those of us who change our own oil often cringe at the prospect of draining ATF. Because many transmission pans don’t have drain plugs, changing the fluid can be a messy proposition –the entire pan must be removed. But even on vehicles that do have drain plugs, the pan still must be removed to change the filter.

Changing transmission fluid is one of those messy jobs that someone has to do. Doing the deed yourself will save money, possibly time and fresh ATF can make your gearbox perform young beyond its years. It’s also relatively easy to determine when your ATF may be low. Consider an automatic transmission service if you detect the following signs of low transmission fluid:

  • Transmission slips
  • Transmission shifts roughly
  • Noisy transmission
  • No drive engagement in forward or reverse gears

How to change automatic transmission fluid: Step-by-step instructions

If you can garner some initial patience, learning how to change automatic transmission fluid will only benefit you in the long run. More importantly, you’ll need an automatic transmission filter kit; they normally contain a gasket for the pan in addition to the new transmission filter and its O-ring. Along with some basic shop tools, you’re ready to get started.

Step 1: Transmission fluid drains better at operating temperature, so let your car idle for a few minutes first. After turning your ignition off, raise and secure the vehicle. Then, lay down a tarp, some cardboard or a newspaper under at least a two-gallon catch pan. Next, remove the bolts from one side of the transmission pan, being cautious of hot exhaust parts and fluid.

Step 2: Gradually loosen the other bolts, which should allow the pan to tilt and begin to drain. Once all bolts are removed, lower the pan and dump the remaining fluid into the catch pan. Gently break the gasket seal with a screwdriver, if necessary.

Step 3: Clean the gasket surfaces on both the pan and the transmission housing. Inspect the pan for metal shavings or other signs of internal damage, and then clean it with solvent.

Step 4: Remove the old transmission filter and O-ring. The filter contains fluid, so keep the drain pan underneath

Step 5: Install the new transmission filter, making sure that its O-ring seats in the appropriate orifice

Step 6: Attach the new gasket to the pan with oil-soluble grease –not gasket sealer or adhesive.

Step 7: Refer to the service manual about using thread sealer on any or all of the transmission pan bolts, then screw in all fasteners finger-tight.

Step 8: Torque the pan bolts to spec in a spiral pattern starting at the center. Maximum torque is often about 12 pounds per foot.

Step 9: Lower the vehicle and fill the transmission with the recommended amount of fluid.

Step 10: Start the vehicle, warm it up, then shut it off and check for leaks. If you don’t detect any leaks, run the vehicle up to operating temperature on level ground, move the shifter through all gears, return to park and check the dipstick while the engine idles.

HOW TO MAKE FUEL PUMPS LAST LONGER

Fuel pump serves a crucial function of delivering fuel to the vehicle’s engine. Although it is a critical component, most car and truck users know very little about the fuel pump.  Sometimes, the fuel pump may need to be replaced during the life of a vehicle.

The most annoying part about this pump is that it suddenly stops functioning. However, you can avoid such a situation with proper understanding, maintenance and care of the fuel pump. To maintain the component properly you need to know its job in detail.

Job of the fuel pump

Every modern car has an electric fuel pump located in the fuel tank. Its job is to transfer fuel from tank to engine’s fuel injection. A steady supply of fuel has to be done in proper quantity and at a standard pressure. Then it will help the engine to perform as expected under different driving conditions.

Taking care of the fuel pump to ensure its long life

As this job is very important and it is also difficult to access the pump because of its location, the pump is usually built robustly.  Many auto mechanics are of the opinion that a fuel pump should last the entire life of a vehicle. However, with years of driving and neglect, the pumps often fail and have to be replaced. Usage and fuel quality are the two most eminent factors on which life of a pump depends. To ensure the long life of a vehicle’s fuel pump you need to follow certain guidelines.

Never keep the fuel pump empty

You cannot let the fuel level fall below a quarter of a tank. The pump is an electrical device and it heats up while doing its job. Manufacturers have thus put the pump inside the tank to keep it cool. If it does not remain immersed in gas all the time the purpose will not be solved. Moreover, when the tank is empty and suddenly gasoline is pumped in, it can give a thermal shock to the pump.

Do not get fuel with dirt

Gasoline mixed with debris is less common these days, as most of the station try to keep high-quality gas. However, try not to stop at the fuel station to fill the tank that is getting gas at the same time. While the station is getting gas all the debris and deposits are stirred up in stored gasoline. If you accept that fuel into your car, the pump filters will not be able to catch them all.

Change fuel filters

You need to replace fuel filters on a yearly basis. Regardless of what is mentioned in the manufacturer’s manual or how many miles you have traveled it is essential to change them so that no debris can enter the pump.

Add anti-ethanol agent

Today, fuel is blended with ethanol.  Ethanol helps the agricultural economy, is good for the environment and helps reduce dependency on foreign oil. If you are not fully utilizing fuel from the tank in a week or two, add an anti-ethanol agent to it. Otherwise, the fuel system may develop issues.

In order to keep your vehicle’s fuel pump in perfect working condition, you have to keep these few simple things in mind. These steps may help the fuel pump to survive the entire life of a vehicle.

6 Tips for Keeping Your Car’s Air Conditioning in Top Shape

The hot summer weather is here and with it is a reminder about how important your car’s air conditioning system is for keeping you comfortable on the road. Here’s 6 tips for keeping your air conditioning running at maximum performance.

1. Run your A/C weekly on defrost mode
You should run your air conditioning weekly for 10 minutes on defrost mode on the coolest setting and at the maximum fan speed. This helps maintain gas pressure, keeps your compressor running well, cleans out moisture and prevents mildew.
This includes running your air conditioning in the winter, which helps remove humidity and works well to defog the windshield.

2. Clean or change the air filter
Dirty cabin air filters prevent proper airflow. Check your filter often and clean or replace it.

3. Don’t pre-cool your car
Your car’s air conditioning operates at maximum efficiency when you’re driving. Don’t pre-cool your car. On extra hot days, put the fan on high once you start driving and open only the backseat windows for 10 to 20 seconds to force out the hot air.

4. Set A/C to the coldest setting
Your car’s air conditioning is most efficient when set to the lowest temperature and adjusting the fan for comfort. Most air conditioning systems cool the air to 3-4 C. A higher temperature forces the system to re-heat the air, burning more fuel.

5. Keep your car clean
Dirt and bacteria can negatively impact your car’s air conditioning system. Keep dirt and debris at bay by cleaning, dusting and vacuuming regularly.

6. Don’t use A/C on recirculate if you have back seat passengers
The recirculation mode pulls air from the front of the vehicle and re-cools it. It works well for passengers in the front of your vehicle, but can leave air stale and hot in the back.

TOP TIPS TO CARE FOR YOUR CAR’S BRAKE SYSTEM

The health of your brake system is crucial to the performance and safety of your car. Poor brake system maintenance not only compromises the efficiency and longevity of your vehicle, but is also a major cause of road accidents.

The brake system is somewhat complex, but fairly easy to maintain. It is critical that you have your brake system inspected regularly and necessary repairs done on time. Some of the key components in the brake system include brake pads, brake lines, master cylinder, rotors and calipers.

Key Brake System Maintenance Tips

1. Have Brake Pads and Rotors Checked Regularly

Due to its nature of operation the braking system endures a lot of wear. Brake pads and rotors form the point of contact between the braking system and the tires. These two components wear more quickly and hence require more attention and maintenance. Brake pads endure a lot of heat which causes a lot of wear. It’s critical that you use high-quality brake pads that offer sufficient resistance to wear.

If you notice you need to apply a lot of pressure to your brake pedal, an increase in your stopping distance or a burning smell you need to have your brake pads and rotors checked.

2. Get a Brake Fluid Flush

When you step on your brake pedal, pressure builds up and is transmitted through brake fluid from the master cylinder, via brake lines and into the calipers. These in turn transmits this pressure to the brake pads and rotors. Brake fluid is therefore a critical component of the braking system since it acts as the messenger of the braking system.

Unfortunately, with time it attracts moisture, which can damage your braking system. This moisture corrodes the metal components of the braking system, reduces the boiling point of the fluid hence compromising the effectiveness of the braking system.

3. Have Your Brake Lines Bled

Apart from getting a brake fluid flush, bleeding of brake lines is also important so as to remove the excess air. When air gets trapped in the brake lines, it compromises the efficiency of the braking system.

4. Replace or Upgrade Brake System Components

From time to time you will need to replace some components of your braking system. This is an opportune time to upgrade to specialized or higher-performance components. Some of the popular brake system upgrades are slotted disc brakes which are more heat resistant and quieter ceramic pads that also emit less brake dust.

5. Brake System Care

There are some external factors that can cause excessive wear to your braking system. Carrying too much weight and heavy breaking are just but some. It’s important that you avoid such situations to preserve your brakes and chances of brake failure.

How to drive in floods and standing water

Driving through floodwater and heavy rain can feel quite perilous at the best of times, often catching out newer drivers or those who don’t have any experience with driving in adverse conditions.

With our quick and easy guide though, you’ll feel better-equipped to navigate these tricky driving situations.

How to drive in floods and standing water

If you hear there’s flooding on the way, try to move your car to higher ground to stop it from getting damaged. Water plays havoc with vehicle electrics and could cause a number of issues (like your airbag suddenly deploying for no reason). Otherwise, follow our tips below:

  • Try to avoid standing water if you can.
  • Don’t drive into flood water that’s moving or more than 10cm (4 inches) deep. Let approaching cars pass first.
  • Drive slowly and steadily so you don’t make a bow wave.
  • Test your brakes as soon as you can afterwards.
  • Fast-moving water is very powerful – take care or your car could be swept away.

If you do get stuck in flood water, it’s usually best to wait in the car and call for help rather than try to get out.

Things to Avoid Doing to a Newly Painted Car

Paint jobs can be so exciting – seeing your car looking brand new and clean all over again. As exciting as it is, paint jobs cost money. Therefore, you need to be careful with your newly painted ride.

So, you just got your car painted at a body and paint service in Penang, and you get the nod to take your new-looking car home.

Well, don’t get tempted into thinking you can do as you please with your car, as you might ruin the freshly painted ride.

This blog post will show you things to avoid doing in a newly painted car to keep it fresh for a very long time.


1. Don’t Leave the Paint Shop Immediately
As soon as the job is done, take your car under broad daylight to look out for defects that may need a rework. If you find any defects, like different shades of colors, it’s advisable to wait until it is fully cured before you try to fix the fault.

2. Don’t wash the car immediately
Yeah, you’d be surprised how many people take their freshly painted ride to a car wash. Don’t do this – as fresh paints need proper curing, and you shouldn’t use soap on the car until after a month (30 days).

If you must wash, take it home, and rinse with cold water, and a microfiber mitt in the shade. Avoid keeping the car in the sun for an extended period.

After washing, use a microfiber towel or chamois to wipe gently. Trust me; you don’t want water marks or swirls on a shiny new finish.

3. Avoid unnecessary drives
Taking your freshly painted car for long, unnecessary rides will open up your new paint job to harsh environmental conditions before it is fully cured. It is advisable and safe to leave your car in a garage for about two months.

Only drive when necessary and during fair weather conditions. During this waiting period, you could use taxi services or use a second car if you have one. Your patience will pay off.

4. Don’t wax your car
There’s a general belief that waxing a newly painted automobile is harmless and will protect the paint job. A professional Honda car service in Penang will advise otherwise, as the curing process involves the paint gassing off itself.

Waxing your freshly-painted car will hinder the color from going through the gassing process. So, be patient and wait for the car to be fully cured. Wait for about sixty (60) days before waxing your car. Also, ensure you use only real carnauba wax your vehicle when ready.

5. Never leave your freshly painted car, outdoors, or under a tree
Severe and unsightly damages can come from leaving your newly painted car, outdoors, or under a tree. Tree sap, bird droppings, and acid rain can damage your new paint job.

Even dramatic changes in temperature can also affect curing and paint adhesion. During the curing period, keep your car in a garage or at least a proper shelter.