How to Check Tire Pressure With a Tire Pressure Gauge

Maintaining proper tire inflation is relatively simple and essential to the overall tire performance of your vehicle. A properly inflated tire will provide longer life, quicker steering response, better fuel efficiency and a smoother ride than an improperly inflated tire. Both underinflation and overinflation can cause headaches like premature treadwear and possible tire failure. The best way to ensure you’re getting the most out of your tires is to check your tire pressure on a monthly basis.

Knowing how to use a tire pressure gauge is very simple. Here’s how to check tire pressure and refill your tires.

Items You Need When Checking Tire Pressure

Tire pressure gauge

Air compressor

Pen and paper

Your tire pressure gauge can be digital or standard. Auto parts stores typically carry both. Many auto parts stores sell portable air compressors that run from your car battery or 12v power port. Alternatively, you can use the air compressor found at most gas stations. They usually cost $0.50 or $1.00 to use.

HOW TO CHECK TIRE PRESURE

1. START WITH COLD TIRES IF POSSIBLE

Vehicle manufacturers specify PSI – literally “pounds per square inch” of pressure – assuming tires are cold. Tires are considered cold when the vehicle has been parked for three hours or more, or if the vehicle has been driven less than a mile (1.6 km) at moderate speed. PSI is the unit your pressure gauge uses to provide readings.

2. CHECK THE MANUFACTURER’S RECOMMENDED PSI

Look on the driver’s side door jamb or your owner’s manual to find the recommended cold tire PSI for your front and rear tires.  If you cannot find it, you should consult your vehicle dealer, manufacturer, or a qualified tire professional.

3. WRITE DOWN THE PSI FOR EACH TIRE

If your front and rear tires require different pressure levels, write down the correct PSI for each to avoid getting confused as you move around your vehicle checking tire pressure.

4. CHECK TIRE PRESSURE WITH YOUR GAUGE

Remove the valve cap from one of your tires. Then place the pressure gauge on the valve stem and press down hard enough so the hiss sound disappears and your gauge provides a reading. With a standard gauge, the air pressure will push a small bar out from the bottom of the gauge. Measurement units are etched into the bar. A digital gauge will show you the reading on a screen.

Write down the reading and repeat this process for all four tires.

5. FILL TO THE RECOMMENDED PSI

Use an air compressor to refill any tires with low pressure. Many air compressors are different, so read directions carefully to be sure you’re using it correctly.

If you’re using the air compressor at a gas station, be sure to park so that the hose will reach all four tires. Insert change into the machine until you hear the motor running. Fill each tire by placing the end of the hose over the valve stem and pressing on the lever.

Using a gas station air compressor means your tires might be “hot.”  If it is necessary to adjust inflation pressure when tires are “hot”, set their pressure to 4 psi (14 kPa) above the recommended cold inflation pressure. Recheck the inflation pressure when the tires are cold.

After filling your tires, use the gauge to check pressure again. At this point, it’s ok if you overfilled the tires because you can always let some air back out. Never drive on overinflated tires. Overinflation can result in decreased traction, premature wear, and decreased impact absorption.

6. REPEAT: CHECK TIRE PRESSURE MONTHLY

Make the above procedure a monthly ritual. Regularly checking your tire pressure is the best way to ensure your tires never dip far below the optimal PSI.


4 Facts you might not know about Bumper & Accent Colors

What if we told you that your bumper color is different from the body color? Or your trim pieces are different from the body color? You might think that sounds absurd, right? How is it possible for the bumper and trim to be a different color from the body color? Well we at Central Texas Collision Services are here to clarify this for you. See our 4 Facts you might not know about Bumper & Accent Colors listed below.


  1. Colors vary based on the substrate on which it is painted. For example, the bumper and trim can be plastic, but the body can be metal. Having these 2 different substrates, but using the same color paint can cause a slight variation due to the evaporation rate for the paint. A longer evaporation rate gives a spec pigment additional time to “float” and can darken the color. This can happen with both older and new cars.
  2. Depending on the angle and lighting available on the curved and flat surfaces, you may notice a slight color change.
  3. During the mixing process, adjustments made can create a lighter or darker color, or causing the metallic or mica elements to lay down differently.
  4. Another scenario can be that the body was painted at one factory, while other parts, such as the bumper and trim, were painted at another factory using a different paint method.


(bodyshopsaustintx)

How to Clean Your Car’s Air Filter

Keeping your car clean on the outside protects the paintwork; keeping it clean on the inside makes it a nicer place to be. Keeping it clean under the bonnet can help maintain its performance and save you money.

If you’re looking to take the next step in car cleanliness, have a think about cleaning your air filter. Filters prevent dust, dirt and debris from being drawn into the engine through the air intake pipe, and they need to be cleaned fairly regularly to maintain the performance and efficiency of the engine.

Here, we show you how to clean a car air filter so you can save money and do it yourself. We’ve also covered the essentials of air filter maintenance, so you know when and how to approach the job.

How to Clean a Car Air Filter

Cleaning the air filter is easy if you have a good idea of where everything is positioned under the bonnet of your car. You can use a couple of different methods to get the job done, and we show you how in our step-by-step guides below.

Before getting started, you should ensure you have a few materials to hand. These include:

  • Screwdrivers
  • A vacuum with hose attachments/handheld vacuum
  • A torch (or natural light will work, too)
  • A bucket
  • Water
  • Laundry detergent
  • A clean towel

Locating the Air Filter:

You’ll find your car’s air filter on top of the engine where it’s easy to reach. If you can’t find it, take a look at your car’s manual, which should label all the different engine components.

Don’t have the manual? Head online, as there’s likely to be a digital version or a YouTube video showing you where it is. Failing that, you should ask a mechanic to point it out next time your car is in for a service.

Removing the Air Filter:

Air filters are normally found in a plastic or metal housing, which you’ll need to open up before you can remove the filter. In newer cars, they’re normally just clipped down, making them easy to remove, but you might need to unscrew or unbolt a section of the housing if your car is older.

When you’ve opened the air filter housing, it should just be a case of pulling the air filter out.

Cleaning the Air Filter with a Vacuum Cleaner:

The easiest way to clean a car air filter is with a vacuum cleaner. Connect the hose attachment to your standard household vacuum, and you’ve got the perfect tool for getting into the ridges of the filter itself.

Vacuum both sides of the filter for about two minutes, making sure you’ve got all the visible dirt and debris. When you’re done, hold the filter up to a bright light, as this will show any bits you might have missed. Go over the filter once more, then you’re ready to replace it.

Cleaning the Air Filter with Water:

If your car’s air filter is very dirty and you have a bit more time on your hands, you can clean it with water. Cleaning an air filter with water takes a lot longer, especially when you factor in the drying time, but it will get you great results.

Start by filling a clean bucket with water and a small amount of laundry detergent. Submerge the filter in the water and swirl it around, using your hands to aggravate dirt and dust out of the filter material. Then, remove it from the water and shake off any excess, before rinsing it under running water.

When it’s clean, place the filter on a clean towel and leave it to dry. Depending on where you dry it, the filter could take up to 24 hours to dry completely, so make sure you give it enough time before you plan to use your car again.

Remember – the filter must be totally dry before you replace it. If it’s even slightly damp, it could cause serious engine problems because dust and particles will cling to it and block the airflow. Make sure it’s bone-dry before replacing it.

What Does a Car Air Filter Do?

A properly functioning car air filter helps prevent contaminants from getting into the engine. It’ll block things like insects, dust particles, and other debris that could hinder the combustion process or damage moving parts.

When your car’s air filter is clean and fully functioning, it can help extend the life of your engine, enhance vehicle performance, and improve fuel efficiency. If it’s clogged, you’re likely to experience reduced performance and efficiency, and in the worst cases, even stalling and reduced power output.

How Often Should You Clean a Car Air Filter?

Aim to clean your car’s air filter every 15,000 miles or so. Your car’s manual will recommend a service schedule for the air filter, so you should stick to it. You may need to clean the air filter more often if you live in a rural area, where there’s usually more dirt and dust on the road.

The air filter can also become clogged quickly during the summer months for the same reasons. If you tend to spend lots of time behind the wheel at this time of the year, then you might want to consider cleaning or even replacing the filter before the warm season hits.

If you don’t drive much, we’d still recommend cleaning the air filter at least once a year as part of a regular service, as this will guarantee the performance and efficiency of the engine. You should also replace the air filter every three years, as they can become brittle and won’t work as well over time.

Cleaning your own car air filter regularly is a great option that can help you save money while also doing your bit to lower emissions.

What Are the Commons Signs of a Dirty Car Air Filter?

Air filters are often overlooked as part of regular maintenance, but it’s important they’re kept clean in line with the manufacturer’s recommendations. If you drive with a dirty air filter, you might notice the following:

  • Reduced fuel economy
  • Unusual engine sounds
  • Reduced power
  • Check Engine Light on
  • Black smoke from the exhaust
  • Misfiring engine
  • Strong smell of petrol or diesel when starting the car

If you experience any of the above and can’t figure out what’s wrong, don’t forget to check the air filter. A thorough clean may instantly solve the problem, or you might need to replace it. Remember, if it’s very dirty, cleaning the filter with water does give better results than simply vacuuming it – just make sure you leave it to dry thoroughly before replacing it.

Avoid the dangers of spring driving with these tips

Spring is just around the corner, and that means longer days and warmer weather. Spring also means no more snow- and ice-covered roads (hurrah!).

Since we don’t have to worry about sliding on slick roads or getting stuck in snowstorms, most drivers assume that better weather makes for safer driving conditions.

Spring brings a number of new hazards to the road that drivers need to pay attention to, and this article will address some of the most important points to remember to ensure you and your family arrive safely, including:

  1. Potholes that form during winter months can damage your vehicle and cause accidents. We will look at how to identify and minimize damage during your drive.
  2. Sun glare is a serious concern for many drivers. We will look at how to maintain your car to minimize sun glare and other items to help keep you safe.
  3. Increased motorcycles and bicyclists with warmer weather could mean more risk of injury. We will discuss several simple and effective tips to keep everyone safer on the roads.
  4. Careful driving in neighborhoods is necessary as more children will be out playing and could dart into the roads without warning.
  5. More wildlife activity, especially in rural areas, means that you need to pay more attention to the road to avoid hitting animals while driving.
  6. Frequent rainstorms bring beautiful flowers but standing water also makes the roads slick and could hurt your eyes. We will discuss several ways to drive safer and reduce eye strain while driving.

WHAT CAN CAUSE HEAVY STEERING?

Heavy steering can be an irritation. But not only can it require more strength to turn your wheel, the causes behind heavy steering mean it could be impacting the safety and performance of your vehicle, too. Learn what can cause heavy steering and solutions to avoid it from our detailed guide.

What is heavy steering?

Heavy steering refers to when the steering wheel of your vehicle becomes stiff, making it difficult to turn. This can be caused by a number of things, such as tyre pressure, lack of fluid oil and tyre alignment. Heavy steering means that it is more difficult to steer your vehicle, and the performance of the car can be compromised by a stiff, unreactive steering wheel.

Steering wheel hard to turn? Learn why

So, what causes heavy steering? Some of the most common reasons behind why your steering feels heavy can include:

  • Tyre pressure – often, if your tyres are not pumped up to the recommended air pressure, this can cause heavy steering. This is especially common in underinflated tyres, as it can mean the grip between the tyre and the road surface is compromised due to incorrect tyre pressure, and steering becomes more difficult.
  • Wheel alignment – if your wheels are not aligned properly, this can also affect steering. If the front-end alignment is out of place, this can lead to uneven tyre wear on the front tyres – making the vehicle pull to the side, which can create heavy steering.
  • Lack of fluid oil – lack of fluid oil in your vehicle, or a fluid leakage, can lead to heavy steering. If there is a lack of fluid oil, or a leak, this can reduce the pressure in the system, meaning the steering wheel does not receive enough supply of fluid to perform freely.
  • Thick fluid oil – on the other hand, thick fluid oil can lead to problems, too. Powering steering fluid can collect debris and dirt over time, which can mean it becomes too thick to flow freely and lubricate all parts of the system. This is a common cause for heavy steering at low speeds.
  • Irregular servicing – when was the last time you booked in for a car service? Without having your vehicle regularly serviced, it means important checks, like the above, will get missed, and you’ll be unaware that you have a problem.

How to avoid heavy steering wheels

However, heavy steering is preventable in some cases. A few of the ways to avoid issues with your steering can include:

  • Checking your tyre pressure
  • Identifying any tyre damage that could be affecting steering
  • Checking wheel alignment
  • Checking the fluid level of your vehicle
  • Booking in for your car service

What the Color in Your Exhaust Means

If you own a car with a modern diesel engine dated 2008 or newer, your vehicle shouldn’t emit any smoke while your vehicle is running. Modern diesel engines have exhaust after-treatment systems that prevent this from happening. Even older car engines dated pre-2008, which do not have exhaust after-treatment systems, should emit only a small amount of smoke. 

A little white smoke isn’t anything to be worried about. You’ll likely see white smoke shortly after you start your engine during colder temperatures. After a few minutes, your engine will reach its average running temperature, and the smoke should dissipate. Other than this scenario, you shouldn’t see any other smoke come from your exhaust. If you notice smoke of any color coming from your car’s exhaust, take your vehicle in to see a mechanic who specializes in diesel and auto repairs.

Different colors of exhaust smoke are indicative of different issues. Learning what different smoke colors mean will help you better identify your engine’s problem. Let’s take a look at the most common smoke colors and the issues they represent. 

Black Smoke

If your car emits smoke that is black or dark grey, there is partly-burned fuel blowing out of your car’s combustion chamber. If your car’s fuel is only burning partially, you may have overloaded fuel into your vehicle. Black smoke is also a sign that your car engine doesn’t have enough air for proper combustion. This may also mean that there isn’t enough time given to burn the fuel.

When your car emits black smoke, you may notice that your car is lacking power or that you’re having problems with fuel economy. Taking your car in for repairs will help to alleviate these issues and improve your engine’s performance.

White Smoke

White smoke is a result of unburned fuel particles passing through your car’s combustion chamber and out of the exhaust pipe. As previously mentioned, white smoke is related to lower temperatures in the combustion chamber. When the chamber isn’t hot enough, some fuel particles fail to ignite. Don’t worry too much if you see white smoke in colder climates. Your car’s engine will warm up as you drive, and your combustion chamber will begin to burn all of the passing fuel particles. 

Blue Smoke

If your car emits blue smoke, there is engine oil burning in your combustion chamber. This could be due to worn out piston rings, broken valve sleeves, or failed turbocharger seals. In cases of blue smoke, auto repair professionals usually opt to run a compression test on the car’s cylinders. If the car passes the test, they then look into the car’s turbo intake piping to check for oil. 

THE TOP SEVEN BENEFITS OF WEARING A SEAT BELT

Depending on when you were born, you might remember from your childhood not being required to wear a seat belt or even having to be confined to the back seat. Even though seat belts were made mandatory equipment in vehicles in the late 1960s, there were no seat belt laws that required drivers and passengers to wear them. Those laws did not come into effect until the late 1980s and 1990s.

Today, wearing your seat belt should be second nature and a natural driving habit whenever you get into your vehicle. Even still, there are still some people who do not see the benefits of wearing their seat belts. Rather, they are placing themselves in greater danger because the vehicle’s safety systems will not protect them in the event of an accident.

What are the benefits of wearing a seat belt? It:

  1. It provides safety to everyone in the vehicle and other motorists. Seat belts save lives, and this is a fact that has been proven through countless studies and research, even if you have an older model vehicle without airbags.
  2. Keeps you in place during impacts. The seat belt keeps you in your seat, not thrown through the windshield, or thrown loose in the vehicle. Most people do not realize the G-forces created during impacts place great strain on the body and result in more serious injuries when seat belts are not worn.
  3. It is designed to work with your airbags. Airbags are designed to help keep you in place, along with your seat belt. If you are not wearing it, then the airbag system is ineffective.
  4. Keeps you from receiving a fine for not wearing one. As already mentioned, there are seat belt laws and, if you are caught not wearing one, you could be issued a traffic ticket, be required to pay a fine, and end up with the violation on your driving record.
  5. Reduces the risks of serious injuries and death. There are people who have survived major accidents where their cars have been totaled, yet they survived with minor injuries because they were wearing their seat belt. If they had not, they could have been seriously injured or, worse, died.
  6. Affects auto insurance rates. If you refuse to wear your seat belt and are getting traffic tickets for it, come renewal time your auto insurance rates could skyrocket because you are considered a high-risk driver—or your policy could even be canceled.
  7. Prevents your auto insurance from declining to cover damages in an accident for not wearing a seat belt. If you are in an accident, regardless of fault, your insurance policy may have a clause that states you will not be reimbursed for any damages, both personal injury, and vehicle damage, if you were not wearing your seat belt.

Common Car Dashboard Symbols

Today’s cars have many different dashboard lights designed to alert drivers to possible problems and to make sure you can take care of those problems quickly.

Here’s a quick guide to common car dashboard icons and what they mean.

1. Check engine light

In newer cars, the lit icon will look like an engine. It means the vehicle’s computer has triggered a diagnostic trouble code indicating there’s an issue. If it occasionally turns on and off, it’s an intermittent problem and you’ll just want to have it checked next time you take it in for maintenance.

However, if it stays on, it means there’s an ongoing problem – though it could be as simple as the gas cap not being closed tightly. If the problem continues, get the engine checked out. If the light flashes rapidly, the problem may be serious and you should get to a repair shop immediately.

2. Tire pressure warning light

This dashboard light looks like a tire with an exclamation point in it and means that the tire pressure in at least one of your tires is low and underinflated. You’ll want to check your tire’s air pressure immediately. You still should check your tire pressure once a month.

3. TPMS light

This dashboard light stands for Tire Pressure Monitoring System and when it comes on, there’s a problem with the monitoring system – probably a failed sensor in one of the wheels. Some people mistakenly believe this means the air pressure is low in the tires, but the TPMS is responsible for keeping track of air pressure in the tires; when it notices a tire is low, it triggers the low tire pressure light. If the TPMS light remains on, have the sensors checked during regular maintenance – and never rely solely on warning signals.

4. Oil pressure warning light

If you see a dashboard light that looks like an oil can, you need to pull over at the nearest gas station. This light signals the loss of oil pressure, and you need to check to make sure you aren’t losing oil.

5. Engine temperature warning light

A warning dashboard light that looks like a thermometer means the engine’s temperature is beyond the normal limits, and it should be checked immediately to keep your car from overheating. You’ll want to check the coolant level and make sure the radiator cap is properly sealed as well as look for coolant leaks. Always allow time for the engine to cool down before checking the coolant level, however, to avoid getting burned.

6. Battery charge warning light

When the dashboard light that looks like a battery comes on, your voltage level is below normal. It means the vehicle’s charging system isn’t functioning properly, so you need to have the battery terminals and alternator checked. If it’s an older battery, you may need to replace it. Learn more about when to change your car battery.

7. Brake system warning light

The dashboard light that looks like a circle inside a set of parenthesis with an exclamation point in the middle represents your brake system – and if it comes on while driving, you need to pay immediate attention to it. It could be triggered by driving with the parking brake on, but it can also mean you’re losing brake fluid.

If it comes on and off intermittently, and you don’t notice a change in braking ability, you should get it to a repair shop as soon as possible. But if it stays on there’s a problem that needs to be taken care of immediately, and you should have it towed to a repair shop.

How to Keep Your Vehicle Safe from Thieves

How common are car thefts? There were 873,080 motor vehicle thefts in 2020 in the U.S., according to the National Insurance Crime Bureau.1 And when citizens are targeted in the most potentially dangerous of these crimes – carjacking – the attacker succeeds in roughly half of all attempts, according to the U.S. Department of Justice.

To find out how to prevent carjacking and car theft read on.

1. Don’t leave valuables in your car

You don’t display your cash, financial statements, and jewelry in your home’s windows, do you? So why would you do the same in your car? Hide those valuables, including purses, computer bags, and the ignition key. You’d be surprised how often people don’t. Two out of five people fail to hide valuables, according to a joint survey from LoJack and the National Insurance Crime Bureau.1 One-quarter leave a purse or wallet inside, and one-third have left bank statements – all of which are appealing to car thieves. One-third say they’ve kept their vehicle running while unoccupied.

2. Park in a well-lit area

Not everyone has a garage. But many have the option of parking on a well-lit street – another deterrent for crooks. Also, etch the vehicle identification number on windows to discourage thieves from stealing the vehicle and selling it to a chop shop.

3. Lock your vehicle doors

The minute you step into an automobile, you’re vulnerable. So lock up right away, before starting the ignition or setting up your music, GPS, etc. (Buckling up is the second “to do.”)

4. Don’t leave your keys in the car

“It’ll just be for a second, I’m only running into the store for a couple things.”

Unfortunately, “a second” is all a thief will need if you leave the keys in the car for them. No matter where you are, or how briefly you’ll be out of your vehicle, always take your keys with you. It sounds obvious, but this is one of the most important ways you can prevent car theft.

5. Stay alert

Staying alert is the best example of how to prevent carjacking. When stopped or slowing down, you increase an opportunity for a carjacker. So at traffic lights, exercise caution. “When stopped in traffic, leave enough space to move forward,” says Brent O’Bryan, vice president of learning and development for AlliedBarton Security Services, a physical security firm.4

6. Know where you’re going

Just as you want to stay in well-lit areas while parking, you don’t want to “hide” in the darkness while driving. “Don’t head into remote or unfamiliar areas,” O’Bryan says. “If you feel like you’re being followed, don’t drive home. Don’t park next to a vehicle such as a van which could be hiding a suspect.”4

7. Install an anti-theft system

If someone does try to break into your car, you’ll want to make it as obvious as possible to anyone in earshot that this has occurred. Anti-theft systems emit loud alarms when they detect some kind of forced entry into your vehicle, alerting anyone nearby and potentially scaring the would-be thief from sticking around. You can also install a GPS tracking system that will show the location of your vehicle if the thief successfully makes off with it.

Having an anti-theft device in your vehicle may earn you a discount on your car insurance.

8. Stay cool during a crisis

Even if you do all the right things, you could still get involved in a carjacking. If so, the safety of you and your passengers remains the top priority. Stay calm – if you panic, it’s more likely a criminal will too. “Never argue; give up your car,” O’Bryan says. “Get away from the area as quickly as possible. Note the suspect’s appearance, and immediately report it to the police.”

8 Items to Include in an Emergency Car Kit

Some of a driver’s worst fears are a dead battery or alternator, a blown gasket, your car running out of gas and any number of other car troubles that leave you stranded on an empty stretch of road.

For winter drivers, there’s also the possibility of sliding off an icy road into a snowbank. A quick call to a tow truck or roadside assistance service will usually get you to safety within a couple of hours, but technology can fail, and there are still parts of the country that aren’t covered by cellular service.

In such scenarios, having a car safety kit with the right components can make the difference in keeping you and your passengers safe until help arrives. 58% of people have some emergency supplies in their cars, but only 30% are confident that what they have is sufficient if bad weather strikes.

Depending on the problem, having the proper tools can also get you back on the road as quickly as possible. While some items should be found in every trunk, not every roadside emergency kit is built the same. You should tailor your kit to the type and condition of your vehicle, as well as the weather in which you’re typically driving. With the unpredictability of winter weather, even drivers in traditional warm-weather states may want to consider adding safety items for snow and ice. It’s always wise to err on the side of caution and include certain items just in case.

Here is the essential emergency car kit list:

1. Flares and lighting

The first and most important safety items to include in your auto emergency kit are flares or reflective triangles, which warn other drivers of the roadside hazard, especially in low visibility conditions. In case of a breakdown, they should be spaced out evenly along the roadside behind your vehicle. For a reusable, longer-lasting option, invest in battery-operated LED flares. A flashlight is also a necessity, especially a multi-use version that flashes.

2. Jumper cables

Jumper cables are another essential to include in the car emergency kit. Batteries can die or lose their juice at the least opportune moment, and jumper cables, with a jump start from another vehicle, can at least get you to the next service station. You should also consider carrying a separate battery pack for starting your car when no one else is around to help.

3. First aid kit

A first aid kit is a must-have item to include in any emergency road kit, indispensable for addressing smaller everyday injuries and more serious wounds from an accident. You can purchase them prepacked with all the essentials or assemble one customized to your needs. Families with small children should include medications that are age appropriate. Be sure to know what medications are needed for your passengers and pack enough to last for a reasonable time.

4. Spare tire, tire iron and car jack

A spare tire and tire-changing equipment should be included in your car emergency kit. You should familiarize yourself with how to change a tire just in case help is unavailable and you have to do it yourself. Check your kit every 6 months and make sure that your spare tire is properly inflated.

5. Mobile phone and charger

Another essential for your safety when driving is a working mobile phone and charger in case of a low or dead phone battery. It’s important that you can call for help if you’ve been seriously injured from a car accident or something is wrong with the car.

6. Water

Along with keeping warm, staying hydrated is an essential element of survival. Keep clean drinking water in smaller plastic containers, which will thaw faster with a little body heat in the winter than large gallon jugs. If driving in a remote area, you should be sure to bring plenty of water – one website recommends at least one gallon per person per day for three days if possible.

7. Nonperishable food

Packing food in your kit will help keep you fed in an emergency. Nonperishable food such as granola bars, soup, nuts, jerky, peanut butter and dried fruit are great options to pack in your kit.

8. Car fluids and tools

Flat tires are one of the most common causes of roadside trouble, but it’s not always possible to change a tire. Including a can of tire inflator and sealant in your kit can get you back on the road at least until the next stop. Other items that may help avert a roadside crisis and keep you going:

  • 1 quart or more of motor oil (make sure it’s the right formula for your car)
  • 1 gallon of coolant
  • A toolkit with screwdrivers, pliers and an adjustable wrench
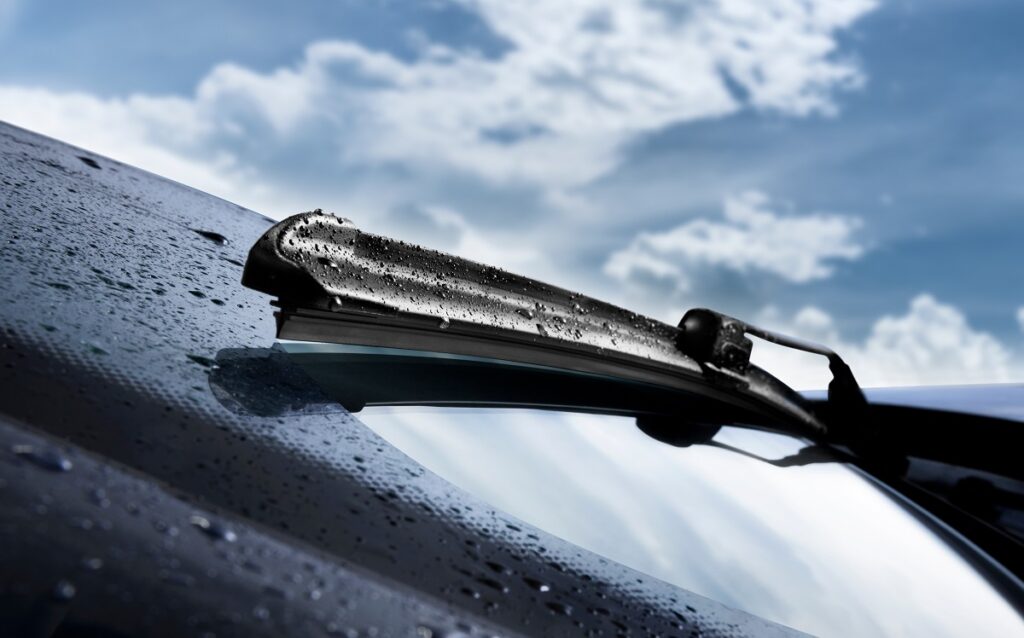
  • 1 set of windshield wiper blades

Good wiper blades are also crucial to have handy, as they can clear a windshield in less than three swipes without leaving streaks. Keep a set of new blades in your vehicle so you can replace worn blades quickly and on the go.