How to Check Your Car’s Oil

Oil is the lifeblood of your vehicle’s engine. Making sure there’s always enough oil is the easiest way to ensure that you avoid catastrophic engine failure and the huge repair costs that go with it.

This is especially important if you’re driving an older vehicle. When a car’s odometer rolls past the 100,000-mile mark, wear on the engine can cause it burn off small amounts of oil every time you drive. That loss adds up, which can make the oil level go down too far between oil changes. High-mileage vehicles are also more prone to oil leaks. Both of those issues are reasons to check your oil regularly to gauge just how often you need to top it up.

Check your oil once a week for a month and you’ll know how quickly it gets depleted—or if it gets depleted at all. Once you know that, you can check it less frequently—say, once a month. Here’s how to check your oil:

Step 1: Prepare to Check

Be sure your vehicle is parked on level ground with the engine off, the transmission in Park (or the manual transmission in a lower gear) and the parking brake on. Lift the hood. If you don’t know how to do this, consult your owner’s manual.

Most vehicles have a hood-release lever under the instrument panel on the left side. There’s also a safety catch under the front edge of the hood that you’ll have to unlatch before you can raise the hood.

Step 2: Locate the Dipstick

The dipstick on most vehicles is easy to spot, as it has a small colored handle—usually yellow or orange—marked with an oil-can symbol.

Step 3: Pull the Dipstick

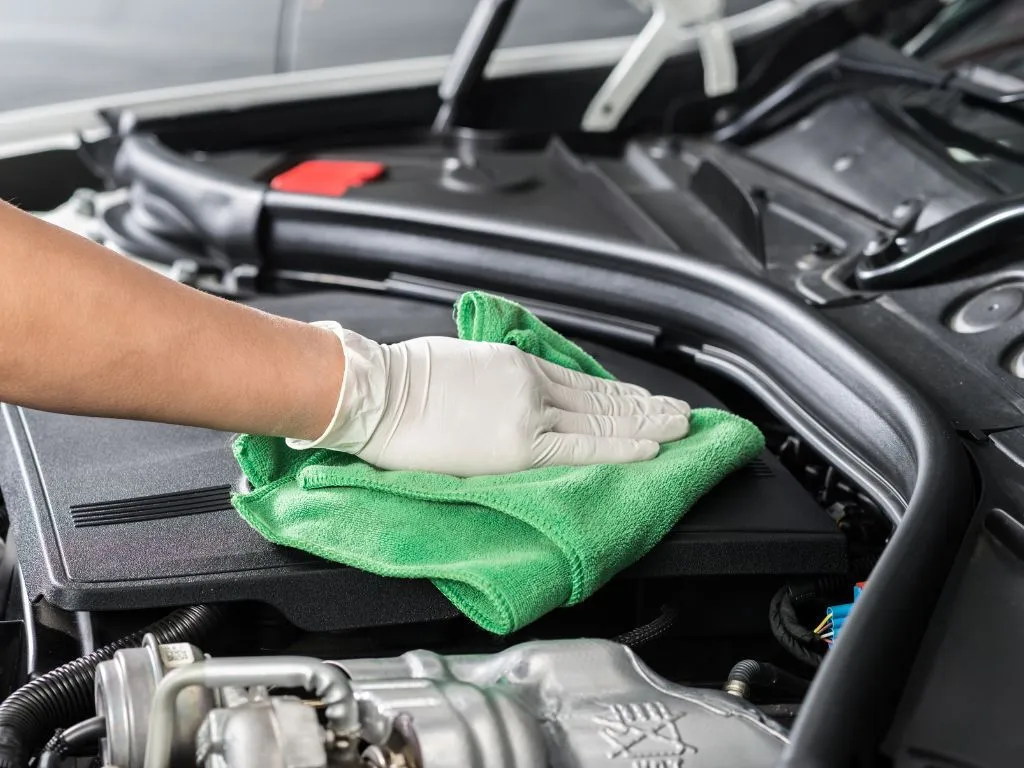
Pull the dipstick fully out of the tube that it’s housed in. It’s like pulling a sword from a sheath. Have a rag or paper towel ready and wipe any oil off of the end of the dipstick. At the tip of the dipstick you will see two lines: the lower one indicates that the oil level is one quart low. The upper line denotes that the crankcase (the car’s oil tank) is full. Some dipsticks are also marked with words like “full” and “add.”

Step 4: Note Oil Level

Insert the dipstick into the tube slowly and push it all the way down. Now withdraw it and look closely at the tip, which should have oil on it. If the level of the oil is between the two lines, your vehicle has enough oil. If it’s at the low mark or below, it’s time to add a quart.

Step 5: Wait and Re-check

Once you’ve added a quart of oil, wait several minutes for the oil to drain down into the crankcase and and then check it again to ensure that the level is at least between the high and low marks. The oil level does not have to be at the high mark for your engine to have enough lubrication to run safely.

Winter Tire Safety Tips

Winter is here, and that means it’s time to prioritize safety on the roads! 🚗 Stay safe and prepared with these essential Winter Tire Safety Tips:

  1. Invest in Winter Tires: Swap out your regular tires for winter ones. They provide better traction and grip on icy or snowy roads.
  2.  Check Tire Pressure: Cold temperatures can cause tire pressure to drop. Ensure your tires are properly inflated to maintain optimal performance.
  3.  Rotate Tires Regularly: Rotate your tires to ensure even wear and better traction throughout the winter season.
  4.  Monitor Tread Depth: Insufficient tread depth reduces traction. Check tread depth and consider replacing tires if they’re worn out.
  5.  Keep Emergency Supplies: Equip your vehicle with essentials like an ice scraper, shovel, blankets, and emergency kit in case of unforeseen circumstances.

Stay safe and #DriveSmart during the winter months!

TIPS FOR WARMING UP YOUR CAR IN THE WINTER

Winter is here, and so is the need to warm up your car! Here are some essential tips to ensure a cozy and safe start in the chilly mornings:

1. RUN FOR 30 SECONDS

Even in the cold, modern cars run safely after about 30 seconds. If your car was made in the last 20-30 years, it uses fuel injection to push an air/fuel mixture into the engine and is ready to drive within about 30 seconds. A fuel injection system has sensors for atmospheric conditions like air pressure, temperature, and humidity and automatically adjust the air/fuel mixture. The newer the car, the more effective and numerous the sensors are. Because of this, it is a good idea to treat your fuel system with a fuel additive from your local AutoZone. Older vehicles used a carburetor to control the mixture going into the engine, with a manual or electric choke making the mixture rich. In cold temps, even electric choked carburetors needed a few minutes to warm up in order to prevent the engine from stalling.

2. DRIVE NORMAL FOR 5 MINUTES

Normal driving for 5-10 minutes warms your car up faster than idling. Your car runs most efficiently at normal operating temperatures. Driving your car normally will warm it up much faster than idling in the driveway. Long idle times waste fuel and cause increased wear and tear on components.

3. MODERN OIL AND LOW TEMPERATURES

While modern, high-quality oil flows better at low temperatures than oil of the past, there is still cause for concern about engine oiling in extreme cold during start-up. Synthetic Oils were originally designed for the very premise of extreme cold temperatures and holding their viscosity better. Once oil gets below 20 degrees Fahrenheit, it very rapidly loses its ability to hold viscosity and becomes thicker and thicker. This makes the original start-up in extreme cold more difficult on the engine, as it is trying to circulate thick, cold oil. The tell-tale sign of this in extreme cold is the ticking and clacking of lifters and engine components during the first 5 to 30 seconds of the engine firing up. Quickly though, as the engine rises in temperature, the oil will begin to flow well. The first number in oil weight, the one with a w, indicates the oil’s ability to perform in low temperatures (w stands for winter). The lower the w number, the better the oil maintains viscosity in cold temperatures

4. RESTRICTED VIEWS ARE DANGEROUS

Make sure your windshield is clear of ice, snow, and debris before driving. Keeping the inside of the windshield clean and clear of moisture will help with fog, before you ever have to use the defroster. If your windshield or windows are foggy, you may want to wait a minute for the defroster to heat up before driving off. Keeping a good ice scraper and snow brush handy can help get your windows clear quickly.

5. USE A BLOCK HEATER AND BATTERY PAD

If you live in or have traveled to the Upper Midwest, Canada or Alaska, you’ve probably seen a vehicle with an electrical power cord sticking out of the front bumper. These cords serve as a quick hook-up to AC power for electrical engine heaters, which are a must-have in extreme cold climates, especially for diesel engines. Engine heaters come in a variety of forms – from oil heaters for the dipstick, heating pads, or magnetic heaters that stick on the oil pan, to coolant heaters that go into the flow of antifreeze on the engine, or battery heating pads to keep your battery warm. If overnight temperatures are 0 degrees Fahrenheit or lower, you may consider an engine block heater and battery pad heater or battery thermal wrap. Both items attach to your car and then plug into an electrical outlet. Some engine block heaters come with timers so you can plan when your engine is ready to drive in the morning. For areas that get constant temperatures in the winter sub-zero, a permanent heater is generally a good practice. For areas that only see several days in sub-zero, using a magnetic heater that attaches to the oil pan overnight is often a good choice. For your battery, trying to hold a charge in very low temps can be draining and potentially harm your alternator. Starting a cold car with a cold battery the defroster, radio, seat warmers, or more puts a heavy strain on the electrical system. Help your battery and reduce this strain with a battery pad heater.

6. USE A FUEL ADDITIVE

Water in the fuel system can be an awful issue to deal with in extreme cold. What’s worse, is diesel fuel is prone to “gelling” in extreme cold temperatures as well. Using a fuel additive such as Heat in a gasoline engine, or Diesel 911 in diesel engines can help insure your fuel is protected.


Determining the Cause of Oil Degradation

What could be causing our lube oil to degrade faster?

There are many causes that can result in the degrading of your lube oil. The most common are oxidation, thermal breakdown of the lube oil, micro-dieseling, additive depletion and contamination.

Oxidation

Oxidation is the reaction of oil molecules with oxygen molecules. It can lead to an increase in viscosity and the formation of varnish, sludge and sediment. Additive depletion and a breakdown in the base oil can also result. Once an oil starts to oxidize, you may see an increase in the acid number. In addition, rust and corrosion can form on the equipment due to oxidation.

Thermal Breakdown

The temperature of the lubricant should be a primary concern. Besides separating the moving parts within a piece of machinery, a lubricant must also dissipate heat. This means the lubricant can and will be heated above its recommended stable temperature. The Arrhenius rate rule for temperature states that for every 18 degrees F (10 degrees C), the chemical reaction doubles. In other words, for every increase of 18 degrees F for your oil, the life of the oil is cut in half. Keeping the oil as cool as possible when in use will extend its life and reduce the reaction of thermal breakdown.

Micro-dieseling

Also known as pressure-induced thermal breakdown (degradation), micro-dieseling is a process in which an air bubble transitions from a low-pressure region in a system to a high-pressure zone. This is very common in hydraulic systems. Micro-dieseling results in adiabatic compression of the air bubble within the oil, which then cooks the surrounding oil molecules, causing instant oxidation of those molecules.

Additive Depletion

Most additive packages in oil are designed to be sacrificial and used up during the life of the oil. Utilizing oil analysis to monitor additive levels is important not only to assess the health of the lubricant but also to provide clues as to what is causing the depletion of the additives.

Contamination

Contamination such as dirt, water, air, etc., can greatly influence the rate of lubricant degradation. Dirt containing fine metal particles can be a catalyst that sparks and speeds up the degradation process of your lubricant. Air and water can provide a source of oxygen that reacts with the oil and leads to oxidation of the lubricant. Here again, oil analysis can be helpful in monitoring your lubricant’s contamination levels.

TOP 5 MOST COMMON VEHICLE PROBLEMS DURING WINTER

The first snowfall of the year is a cause of celebration for many folks. There’s just something special about seeing those pretty flakes flying for the first time in November or December. But, the onset of winter also means it’s a good time to ensure your vehicles maintenance is up-to-date. Freezing temperatures can lead to issues with your vehicles. Read on for the five most common problems—and how to prevent them this year

  1. Your battery may die in colder weather. It’s a good idea to have your battery tested every time there is a routine service (like an oil change) performed on the vehicle. It also helps to keep your car or truck in a garage during the winter months if possible.
  2. Fluids thicken. To stay ahead of this common winter problem, be sure to have your trusted auto technician regularly check your oil, antifreeze, power steering, brake and transmission fluids. Leaks can also occur; it helps to warm up your vehicles before driving them.
  3. Parts corrode. Road salt laid down to melt the ice and help prevent slide offs can stick to your car’s metal components. If it’s left there, it can cause these to corrode. Wash vehicles regularly to protect the undercarriage, brakes and wheel wells.
  4. Your tire pressure will drop. Most tires lose one pound per square inch (psi) for every 10 degrees F of temperature drop. Under-inflated tires do not perform well in icy weather, so it is crucial to check your tire pressure throughout the winter season.
  5. Spark plugs may fail. A bad spark plug, ignition component or clogged filter may cause your vehicle not to start, so it’s smart to check these ahead of the harshest driving conditions.

COLD WEATHER CAR MAINTENANCE TIPS

As winter settles in, your vehicle may encounter unique challenges that could impact its performance if you’re not adequately prepared. Proactive maintenance tailored to cold weather conditions can ensure that your car remains resilient, providing a more seamless and confident driving experience throughout the winter months.

INSPECT YOUR BATTERY

Cold temperatures can be especially taxing on car batteries. Verify the charge and connections of your battery; if it’s several years old, consider having it tested or replaced before the onset of intense cold.

CHECK YOUR TIRES

Regularly monitor your tire pressure, as it tends to decrease in colder climates. Additionally, assess the tread depth to confirm it meets safety standards.

TOP UP FLUIDS

Maintain recommended levels of essential fluids such as antifreeze, windshield washer fluid, brake fluid, and oil. Antifreeze is particularly critical for engine protection in extremely cold weather.

EXAMINE THE LIGHTS

With shorter daylight hours in winter, it’s essential to inspect all your lights—headlights, brake lights, and turn signals. Replace any dim or burnt-out bulbs.

PROTECT YOUR WIPERS

Visibility is paramount during winter driving. Check your windshield wipers for signs of wear and tear, replacing them if needed. Consider using winter-grade wiper fluid to prevent freezing.

PREPARE AN EMERGENCY KIT

Anticipate unforeseen circumstances by keeping an emergency kit in your car, equipped with essentials like a blanket, flashlight, jumper cables, a shovel, and non-perishable snacks.

MAINTAIN A FULL FUEL TANK

Running your car on a nearly empty tank in cold weather can lead to moisture in the fuel lines, potentially causing issues. Keep your tank at least half full to minimize the risk of fuel line freeze-ups.

Investing time in cold weather car maintenance can significantly impact your vehicle’s winter performance. Adhering to these straightforward tips can mitigate common winter-related problems, ensuring a safer and more dependable driving experience as the temperature drops. Stay proactive, stay safe, and confidently navigate the winter roads.

4 Basic Maintenance Tips for Your Pickup Truck

Pickup trucks offer reliability, safety, and longevity for many drivers. A quality truck can haul thousands of pounds in towing power and provide a safe means of transportation for you and your family.

Over time, if you ignore its maintenance needs, a pickup truck can run into permanent problems. Adhere to these four basic maintenance tips for your pickup truck so that your vehicle runs smoothly. Before you know it, your car can outlast its life expectancy and provide years of dependability.

Check Your Vehicle Fluids

For a pickup truck to run correctly, it needs the necessary fluids. First and foremost, engine oil needs to remain clean and free of dirt, dust, and debris. Additionally, other fluids such as engine coolant, windshield washer fluid, and other liquids must stay specific to your make and model.

Checking your owner’s manual will provide the correct fluids you need so you don’t accidentally pick up the wrong one. For engine oil, pickup trucks older than 2007 need oil changes every 5,000 miles, while newer vehicles require replacement every 7,500 miles. It’s one of the basic maintenance tips for your pickup truck you need to know.

Rotate Your Tires Routinely

Over time, tires start to wear down and lose their tread on the road. The less tread your tires have, the worse the grip is on the road. Uneven or worn tread can quickly result in hydroplaning during a rainstorm or sliding along icy roads.

Getting your tires professionally rotated will help prevent this issue. It helps maintain an even amount of treadwear on your truck’s tires. Additionally, it helps prolong the life of your tires and vehicle suspension while improving gas mileage.

Keep the Exterior Clean

Whether you live in consistent 75-degree and sunny weather all year-round or somewhere where you experience all four seasons, your pickup truck endures a lot. Rainstorms, road salt, hail, and other loose debris can kick up into your vehicle’s paint and create a layer of grime.

Maintaining a consistent cleaning schedule will keep your vehicle’s exterior looking beautiful and shiny. Regularly cleaning your car will also keep your car’s paint from fading and even reduce rust growth. Lastly, don’t forget to clean your undercarriage.

Keep an Eye on Wheel Alignment

When you get your oil, it’s also essential to check your wheel alignment. Wheel misalignment can occur by driving through roads at high speeds and aggressive driving. It can easily throw your wheel alignment off and subsequently increase wear on your tires, worsen gas mileage, and affect hauling abilities. Make sure you maintain your wheel alignment through evenly inflated tires. Loading evenly into your truck bed to prevent vehicle pulling can also maintain the alignment.

Having a pickup truck brings plenty of benefits to your daily routine. Maintaining and caring for your truck is a regular investment of your time and energy, but it’s worthwhile.

5 SAFE DRIVING TIPS FOR THE THANKSGIVING HOLIDAY

Keep these tips in mind as you make your Thanksgiving holiday travel plans:

  1. Be flexible in your travel plans. If you can, try to avoid leaving during peak traffic hours. Leave a bit earlier than you originally planned in order to beat some of the rush.
  2. Perform a maintenance check on your vehicle. Before you hit the road, perform a check of your vehicle’s engine, fluids, headlights, windshield wipers, brakes, turn signal, and tires. Make any necessary repairs in order to reduce the chance of an accident caused by a maintenance failure.
  3. Take rest breaks. If you will be traveling a long distance, make sure that you pull over and take regular rest breaks to eat a snack, stretch your legs, and get some fresh air. Taking breaks is an effective way to ensure that you stay alert and fresh and avoid becoming impatient and fatigued while driving.
  4. Be patient. For even the most patient drivers, heavy traffic can be frustrating. However, it is important that you not let your frustration affect your driving. Avoid the temptation to speed, tailgate, or make unsafe lane changes or passes.
  5. Designate a driver. If your Thanksgiving get-together will involve alcohol, be sure to designate a driver if you need transportation. Drunk driving accidents tend to spike during the holidays – don’t allow yourself or your family members to become part of the statistics.

6 TIPS TO MAKE YOUR CAR TRAVEL READY THIS HOLIDAY SEASON

Here are a few easy ways you can prepare your car for a road trip:

  1. Check Tire Pressure – This step is essential because you can get better gas mileage when you drive on properly aired tires. Not only will you be able to save some money in doing this, but you’ll decrease your risk of a dangerous blowout as well.

  2. Have Any Warning Lights Diagnosed – If you have some warning lights on your dashboard that you’ve been ignoring up until now, you’ll want to have them diagnosed before a long-distance trip. .

  3. Look at Your Fluids – The fluids in your engine enable it to run correctly, so you don’t want to be without them! You’ll want to check your oil, antifreeze, power steering fluid, brake fluid, transmission fluid, and windshield washing fluid.

  4. Replace Old Windshield Wipers – Putting up with inefficient windshield wipers gets old after a while. Replace old ones before a trip, so you don’t end up frustrated, or unable to see, in the rain.

  5. Notice Unusual Brake Noises – If your brakes have been making a whining or grinding noise recently, it’s probably time to take your car in for brake service.

  6. Check Your Lights – If your headlights aren’t working, visibility while driving at night can be an issue. If your brake lights or turn lights are burnt out, you pose a danger to both yourself and other drivers. Have a spotter assist you in checking your headlights, taillights, brake lights, and turn lights.

8 Signs of Auto Transmission Failure

While an auto transmission failure isn’t a death sentence for your car, it can definitely be a major repair. It usually means a lot of downtime and a huge bill. Your transmission is an amazing work or art. Ok, you might not want to mount it over your fireplace, but you have to admit that it is rather fascinating how all these gears and bearings and interestingly shaped parts are put together to create a system that actually propels your vehicle from Point A to Point B. Some people say that the transmission is the second most important part of the car, next to the engine. But, I respectfully disagree. It’s really a team effort – you can’t have one without the other. While, I guess you can, but they are rather useless independently. They are like the heart and the brain of your car. They work together. So, a problem with your transmission can affect the operation of the engine. And if you don’t fix it, you could have even bigger issues to deal with.

But, contrary to popular belief, an auto transmission failure doesn’t always have to be scary (are you breathing a sigh of relief now?) While it can be a costly adventure, in a lot of cases, the problem is actually quite minor. And, as with anything mechanical, if you catch the problem early enough, you may be able to avoid more serious issues. But, you can’t always count on mechanics to offer you the easy way out. After all, they are in the business to make money. So, when they see a woman walk through their doors, they get dollar signs in their eyes.

Transmissions are complex and complicated systems so fixing them usually requires a professional. But, that doesn’t mean that you have to accept whatever diagnosis you are handed. If in doubt, get a second opinion. Or, better yet, learn how to recognize the most common signs of auto transmission failure and how to rule out simple fixes before you authorize an expensive auto transmission repair. Replacing or rebuilding may be necessary, but it is important to check out other possibilities first. You never know, some basic knowledge could save you thousands of dollars.

Signs Of Auto Transmission Failure

  • Slippage. This is when your motor is revving but your car isn’t responding. It’s similar to the way your vehicle would react if your tires were slipping on ice or stuck in the snow. You are pushing the gas pedal and you can hear the engine roaring, but you don’t seem to be getting anywhere. Slippage affects your transmission’s ability to propel the car forward and if it gets really bad, eventually you may not move at all.
  • Leaks. Check under your car on a regular basis to make sure there aren’t any leaks. In most automatic transmissions the fluid is red, so if you notice a colored puddle on the ground, you should probably have your car checked out. In fact, if you notice any puddle at all (except for the ones made from your AC) you should investigate further.
  • Smells. If your fluid level is low, your transmission can overheat. When your transmission or transmission fluid gets too hot, you may notice a burning odor. Check your fluid level and add if necessary. You may also want to find out why the level was low in the first place.
  • Sounds. Knocking, whining, humming, buzzing, clunking, and grating can all be signs of transmission problems. These sounds can be a result of wear and tear, but they also can mean a low fluid level.
  • Delayed Engagement/Lack of Response. Sometimes your transmission doesn’t want to do what you ask when you ask. Just like your kids, right? But, unlike your children, there are times when motherly negotiations (aka bribing) will not convince your vehicle to behave properly. There are varying degrees of delayed engagement, and sometimes we are in danger of letting things for too long.
  • Rough Shifting. Again, your car should transition between gears smoothly. If you notice shaking, jarring, bumping, clunking, or abrupt/hard shifting, this may be a sign of transmission problems.
  • Fluid Color. Transmission fluid is red, clear, and has a slightly sweet odor. Look at a sample of new, clean fluid so you know the correct color and smell. If the fluid in your vehicle is murky, dark, or dirty, this could be an indication of problems. Sometimes changing the oil or doing a transmission flush will fix the issue. In some cases, more serious repairs may be necessary.
  • Check Engine Light. Sensors in your car can pick up small vibrations or other problems even before you notice them. The check engine light could be a warning of transmission problems, especially if you are also experiencing any of the above signs.