Signs of a Bad Car Thermostat

A broken car thermostat can significantly impact how a car runs. Learn about a thermostat’s function, signs that it may be faulty, and how to troubleshoot problems.

What does a thermostat do in a car?

A thermostat regulates the temperature of coolant in a car, helping the engine operate at an ideal temperature. The thermostat is a valve located between the engine and the radiator, and it closes or opens based on the engine’s temperature. It stays closed when the engine is cold and opens as it heats up, allowing coolant to flow to the radiator to cool the engine.

Signs of a bad thermostat in a car

An overheated engineThis is the most common symptom of a bad thermostat. If corrosion or age has caused the thermostat to remain closed, the coolant won’t flow to the radiator, and the engine can overheat. This will be indicated in a high temperature reading on your dashboard temperature gauge.

Unusual temperature readings: Keep an eye on the dashboard temperature gauge for fast jumps from normal to hot or unexpected fluctuations. These could be caused by a faulty thermostat sending mixed signals to the gauge.

Low coolant levels: An improperly working thermostat can lead to low coolant levels in the radiator. If you suspect thermostat issues, you could consider visually checking your coolant levels. When the vehicle is off and completely cool, open the hood and find the radiator and coolant reservoir. The reservoir is probably made of clear plastic so you can see the fill line and the coolant level.

Issues with the vehicle’s heat: During cold weather, it could take a long time for the heat to be noticeable, or the temperature in the car may just never feel warm enough.

Lower fuel efficiency: An engine that isn’t running optimally can lead to poorer fuel economy.

How to test a car thermostat

Before replacing a thermostat, it’s essential to run a test to confirm that it’s faulty. However, always remember to work on a cool engine, use gloves and eye protection, ensure that there’s plenty of ventilation, and consult professionals if you need assistance. Safety should always be a priority when dealing with car maintenance.

Feel the radiator hose: When the engine is warming up, a cold hose may indicate that the thermostat isn’t working properly.

Use an OBD-II scanner: This device allows you to check engine temperature variances. With the ignition off, plug the scanner into the OBD-II port, which is usually under the dashboard on the driver’s side of the car. From there, follow instructions on the scanner for additional information that might be needed, then read any diagnostic codes and view live data and sensor readings.

Perform the boiling water test: Placing the thermostat in water and bringing it to a boil lets you see how it performs. Follow these steps to test your thermostat:

  1. Remove the thermostat from the car and drain the coolant from the radiator.
  2. Examine the thermostat to see if it’s already in an open or closed position; if it’s fully open, it’s probably faulty.
  3. Get a pot large enough to hold the thermostat and bring water to a boil; submerge the thermostat in the water.
  4. Once the water’s boiling, measure the water’s temperature with a thermometer.
  5. The thermostat should start to open at the specified temperature, which is usually printed on the thermostat; if it doesn’t open or opens too early, it’s faulty.

Can you drive a car with a bad thermostat?

It’s possible to drive with a bad thermostat, but it’s not recommended. Doing so can cause your car to overheat, leading to severe engine damage that will be costly to repair.

How to change a faulty thermostat in a car

Always use safety precautions and consult a professional for help when needed. Follow the steps below to replace a faulty thermostat yourself:

  1. Put a large bucket or container under your work area to catch radiator fluid; save it to pour back into the radiator when finished.
  2. Follow the radiator hose to the thermostat, remove the clamp, and remove the hose (fluid will drain from the radiator).
  3. Remove the bolts holding the housing and old thermostat.
  4. Remove the gasket around the old thermostat’s housing.
  5. Install the new thermostat with the spring side down and replace the bolts.
  6. Replace the hose and hose clamp and pour the fluid into the coolant reservoir.

Coolant Leak Symptoms and Causes

A coolant leak can be a really dangerous problem for your vehicle. The cooling system is essential for regulating engine temperature and preventing overheating, making it crucial to identify and address coolant leaks promptly.

In this blog, we’ll explore the symptoms and causes of coolant leaks, the seriousness of the issue, and the potential cost of repairs.

Common Symptoms of Coolant Leaks

  • Low Coolant Level: The most apparent sign of a coolant leak is a consistently low coolant level in the reservoir or radiator.
  • Overheating: If the engine temperature gauge rises significantly or you notice steam or smoke from under the hood, it may indicate a coolant leak.
  • Sweet Smell: A sweet, maple syrup-like smell inside the car or around the engine compartment can be a sign of leaking coolant.
  • Visible Coolant Puddles: Finding puddles of bright green, yellow, or pinkish fluid under your vehicle after parking can indicate a coolant leak.
  • White Exhaust Smoke: Coolant mixing with engine oil can produce white exhaust smoke, indicating a possible head gasket leak.
  • Coolant Warning Light: Some modern vehicles have a coolant warning light that may illuminate when there’s a significant drop in coolant level.

    How Serious is a Coolant Leak?

    • A coolant leak is a significant concern as it can lead to engine overheating, which may cause severe damage and potentially lead to engine failure if left unaddressed.
    • Operating a vehicle with a coolant leak can result in reduced cooling efficiency, increasing the risk of engine overheating, especially in hot weather or during long drives.
    • Ignoring a coolant leak can cause damage to engine components, such as the water pump, radiator, and head gasket, leading to expensive repairs.

    Is it Expensive to Fix a Coolant Leak?

    The cost of repairing a coolant leak can vary depending on several factors, including the cause of the leak, the extent of the damage, and the make and model of your vehicle. However, compared to the potential damage and costs associated with engine overheating, addressing a coolant leak promptly is relatively affordable.

    • Inexpensive fixes may include replacing a damaged hose, tightening the reservoir cap, or fixing a small radiator leak.
    • Repairs involving the water pump, heater core, or head gasket can be more expensive due to labor-intensive processes.
    • If the engine block or cylinder head is cracked, it may require significant repair or engine replacement, making it one of the costliest scenarios.
  • Causes of Coolant Leaks

    • Damaged Hoses: Cracked, worn, or damaged coolant hoses are a common source of leaks. Hoses can deteriorate over time due to heat and pressure.
    • Radiator Leaks: Corrosion or physical damage to the radiator can cause leaks. Regular maintenance can help prevent radiator issues.
    • Water Pump Issues: A faulty water pump with a damaged seal can lead to coolant leaks.
    • Loose or Damaged Coolant Reservoir Cap: The cap seals the coolant system, and if it’s loose or damaged, it can cause coolant to escape.
    • Head Gasket Failure: A blown head gasket can allow coolant to mix with engine oil or leak externally.
    • Heater Core Leaks: If the heater core, which heats the cabin, develops a leak, it can lead to coolant loss.
    • Freeze Plug Failure: Freeze plugs, also known as expansion plugs, can rust or corrode, resulting in coolant leaks.
    • Cracked Engine Block or Cylinder Head: In rare cases, cracks in the engine block or cylinder head can cause coolant leaks.

5 Tips on How to De-Ice Your Windshield & Keep Ice Off of It

Winters are unkind to drivers. Slick roads, waiting several minutes for your car to warm up in the frigid weather, and trying to keep snow, sleet, and freezing rain off your windshield.

Today’s blog showcases how to de-ice your windshield and keep the ice off as you drive to your destination.

Ice Scraper

Your primary tool is an ice scraper for removing ice on your windshield. Purchase a plastic and not a metal one because metal can scratch the glass and damage the wiper blades.

Start with the edges of your windshield rather than the middle. If you start in the middle, you may be tempted to pound your way to the windshield to get an edge underneath the ice. Rather than using force, use heat to loosen the ice.

Car Defroster

The key to heating your windshield comes from your vehicle’s defroster. Before you lift your scraper, start your car’s engine, set the air conditioning to defrost, and set it to recirculate. Set the controls to full heat. As your engine warms up, the heat will get more intense.

Eventually, the ice against your windshield will soften. Then you can get your scraper’s edge against your windshield and remove the ice. Go slowly and smoothly to prevent ice chips from spraying around your eyes and face.

Patience

The key to this process is patience. It may take 10 to 15 minutes for your vehicle’s heater to get warm enough to start melting the ice. Then, it could take another few minutes for the ice against the windshield to become soft enough to scrape the ice off.

However, this method will reduce the physical effort required to de-ice your windshield. It might even take more time to exert yourself while trying to get through the ice on your windshield than waiting for your heater to get warm. The trick is to leave enough time (maybe an extra 20 to 30 minutes) to de-ice your windshield before starting out on your trip.

Once you clear your windshield of ice, you need to keep it clear.

De-Icing Fluid or Spray

You can purchase de-icing fluid that goes in your windshield wiper fluid reservoir under the hood. However, that doesn’t work if your windshield has ice on it. Set some aside, fill up a spray bottle, and spray it on your windshield to loosen some of the ice. This method works because the de-icing fluid has a lower freezing point than water. Once the ice is loose, scrape it away.

Rock Salt Spray

Although not as effective as commercially available de-icing fluid, you can fill a spray bottle with water and add a few scoops of rock salt. The rock salt will lower the freezing point of the ice, allowing you to get under the ice more easily than without it.

Keeping Ice Off Your Windshield Once It’s Gone

There are two keys to keeping ice off of your windshield while driving. First, keep your defroster on hot, even at a low setting. This will keep your windshield from fogging up. Second, use your windshield wipers to keep snow, sleet, or freezing rain from cluttering your view and covering the glass.

If your car is parked outside, use a windshield cover to protect your wiper blades. They range in price from $10 to $30. If not, cover your windshield with a large towel or tarp. Before putting it on your windshield, soak the cover in diluted saltwater to prevent the cloth from freezing to the windshield if the precipitation starts as a liquid and then freezes.

How NOT to De-Ice Your Windshield

There are some ways not to de-ice your windshield, even though you may think they are convenient. Do not use hot or boiling water to de-ice your windshield. Not only will the water refreeze and make the icy windshield worse, but the sudden hot temperatures could crack your windshield due to thermal shock.

One DIY remedy includes a mix of vinegar and water. But this doesn’t work well since vinegar can corrode chrome and your vehicle’s paint job. Worse, vinegar may cause micro-pitting on the windshield glass, meaning very small holes could form. Over time, as more debris lands on the windshield at high speed, cracks could form more readily.

What Is an Ignition Coil?

An ignition coil, as its name suggests, plays a vital role in igniting the engine. This small yet potent device delivers up to 60,000 volts of power to the spark plugs to ensure your vehicle’s smooth operation. You can find the ignition coil nestled within the engine compartment. The heart of your vehicle’s performance lies in its ignition system, with the ignition coil playing a starring role. Keeping it maintained will help to have a smooth, efficient drive.

What does an ignition coil do?

The ignition coil functions as a power transformer. It takes the 12-volt charge from your car battery and transforms it into something much more potent. This converted voltage, which can reach up to 60,000 volts, is what your spark plugs need to ignite the fuel-and-air mixture within the engine’s combustion chambers. Without a functioning ignition coil, the spark plug would not receive the necessary voltage to create the spark needed to ignite the fuel-air mix.

Where is it? The location of your ignition coil depends on the make and model of your vehicle. One common location is attached to the spark plugs on top of the engine block.

Types of ignition coils

Understanding the different types of ignition coils can be incredibly helpful, especially when it comes to maintaining your vehicle or diagnosing potential problems.

Canister-style coils

Conventional ignition coils, often referred to as canister-style coils, were very common in older vehicles. The design of these coils is quite simple: A metal canister houses the primary and secondary windings. They typically sit outside the engine and are wired to a distributor, which then takes on the responsibility of distributing the high voltage from the coil to the spark plugs. Despite their simplicity, conventional ignition coils are known for their durability and reliability.

Distributorless ignition system (DIS) coils

As technology advanced, so did ignition coils. Enter the distributorless ignition system (DIS) coils. These coils represent a significant step forward in ignition technology. Instead of relying on a distributor, DIS coils are usually mounted directly on or near the spark plugs. Each coil is tasked with supplying high voltage to a specific spark plug. This design allows for more precise timing of spark production for each cylinder, thanks to the use of sensors. The result is improved ignition performance and efficiency over conventional coils.

Coil-on-plug (COP) ignition coils

Taking the concept of DIS coils a notch higher, we have the coil-on-plug (COP) ignition coils. In a COP system, each cylinder gets its own personal ignition coil, which is mounted directly on the spark plug. This setup eliminates the need for spark plug wires, allowing for even more precise and efficient ignition. COP ignition coils provide enhanced spark energy and better control over combustion. The outcomes are improved engine performance and reduced emissions.

Signs of a bad ignition coil

How can you tell if your ignition coil is failing and needs attention? Here are some common signs:

  1. The check engine light is on: If it illuminates, it could be indicating a problem with your ignition coil.
  2. The engine misfires: Should your ignition coil begin to fail, it might fail to supply adequate voltage to the spark plugs, resulting in misfires.
  3. Starts are difficult: When spark plugs aren’t receiving enough power to ignite the fuel-air mixture in the engine, your vehicle will have a hard time starting.
  4. Fuel economy decreases: A failing ignition coil can disrupt the balance of fuel consumption and power generation, leading to less-than-optimal fuel economy.
  5. Power begins to lag: A bad ignition coil might not supply enough power to the spark plugs, resulting in reduced engine performance.
  6. The engine backfires: This might indicate a faulty ignition coil failing to ignite the fuel in the combustion chamber adequately.

How long do ignition coils last?

On average, a well-maintained ignition coil should last around 100,000 miles. However, this can vary depending on factors like your driving habits, vehicle make and model, and even the climate you live in. It’s important to remember that preventive maintenance is always better than reactive repairs. Regular check-ups can assist in identifying potential issues before they develop into more severe (and expensive) complications. So, if your check engine light has been flickering or your engine is misfiring, it’s best to schedule a visit to your mechanic sooner rather than later.

Understanding your vehicle, including the vital role of the ignition coil, ensures smooth and efficient driving. However, even with impeccable maintenance, unforeseen issues can arise. Having the right auto insurance is key to protecting your car from unexpected repair costs and other road-related incidents. It not only gives you peace of mind but also helps to ensure that you get back on the road without worrying about financial implications.

How to Winterize a Car in 11 Easy Steps

Taking time to prepare your car for winter weather is a smart way to help make time on the road safer and more comfortable.

Why car winterization is essential

Snow, ice and freezing temperatures can affect the way cars operate and make driving more difficult and hazardous. Ensuring your car is prepared for winter can help put you in the best possible position to safely navigate winter driving.

When should you winterize your car?

Planning ahead is the best rule of thumb for winterizing your car. While the arrival of winter conditions will vary based on where you live, starting on the checklist below in the autumn will help you be ready before the first icy blast.

Here are the 11 parts of your vehicle you should winterize to get ready for the cold.

1. Check antifreeze and the cooling system

  • The cooling system and antifreeze/coolant keep your engine running well in cold temperatures, so it’s important that everything is working correctly.
  • Follow the owner’s manual instructions to verify that your coolant/antifreeze is at the proper level and consider visiting a mechanic for a check of your cooling system.

2. Check tires

  • Colder temperatures can cause tire pressure to drop. To ensure you have optimal grip for winter driving, check tires at least once a month for the proper tread and recommended tire pressure (you’ll find the recommended tire pressure inside the driver’s side door, doorframe, or in the owner’s manual).
  • Replace worn tires.
  • All-weather tires are generally sufficient for winter, but some states require vehicles to have tire chains or snow tires with studs, so make sure to check local laws.
  • If you live in an area prone to snow and ice, consider winter tires, which are designed to provide better grip in those conditions.

3. Replace worn windshield wipers

  • Install fresh windshield wiper blades to give you a clear view while driving in winter weather.
  • Replace wiper fluid with a winter mixture and maintain the proper fluid level.
  • Depending on your climate, consider winter wiper blades to help cut through snow and ice.

4. Check brake pads and brake fluid

  • Check brake fluid levels and brake pads for wear and tear.

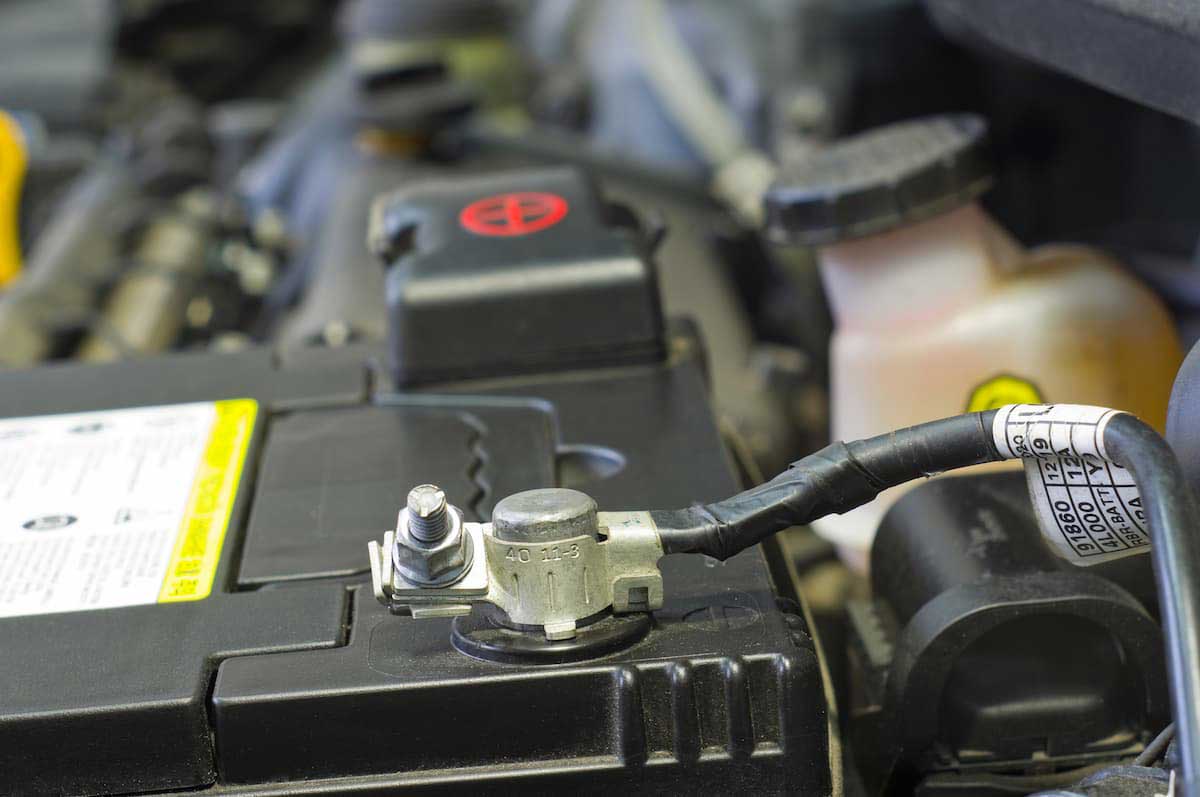
5. Test car battery

  • Make sure battery cables and terminals are secure and free from corrosion.
  • Consider having your battery tested by a mechanic, especially if it’s more than 4 years old.

6. Check heater and defroster

  • Turn your heater and defroster on and off to make sure they’re working correctly.

7. Clean foggy headlights

  • Make sure all lights are clean and working properly.
  • Clean lights off prior to driving in any type of precipitation.
  • Replace headlights that are foggy, hazy or damaged to improve visibility.

8. Check motor oil

  • Change motor oil and filter at recommended intervals.
  • Heavier oils thicken at lower temperatures and may not lubricate as well, so consider switching to “winter weight” or less viscous oil.

9. Inspect exhaust system

  • To help keep carbon monoxide out of the passenger compartment, have a mechanic check for leaks or faulty seals.

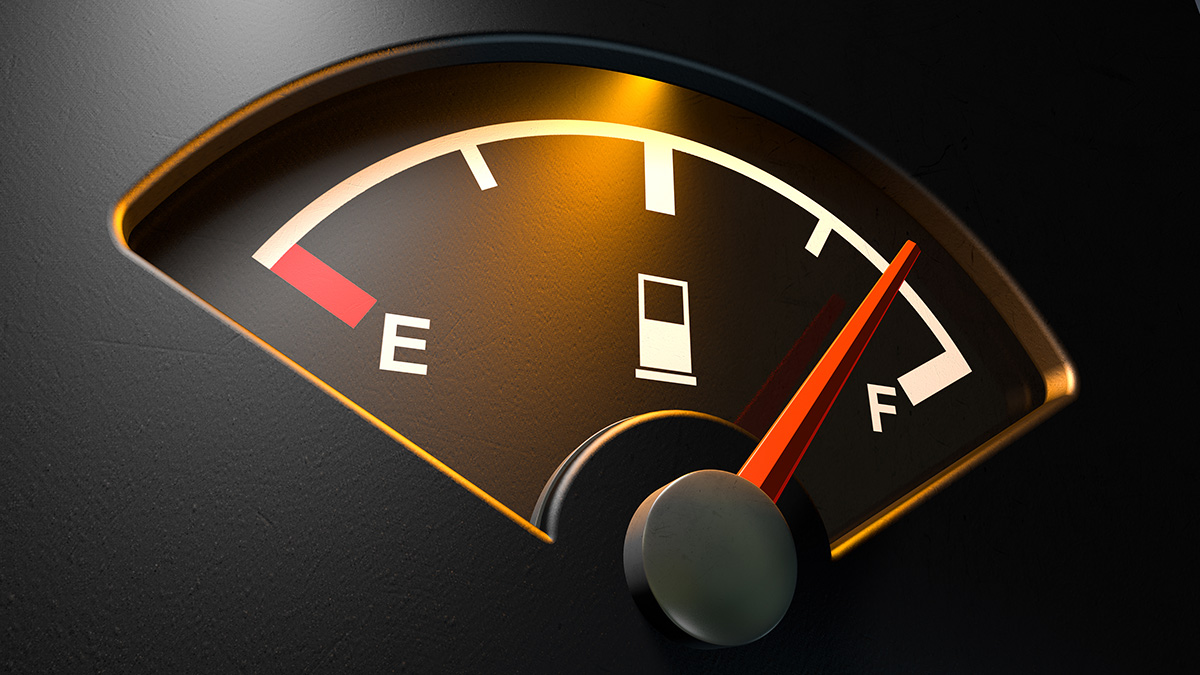
10. Keep the gas tank at least half full, or the battery charged

  • To help prevent fuel lines from freezing and to give you plenty of gas in case you’re stranded, keep your tank at least half full. [6]
  • For electric and hybrid vehicles, keep your battery charged and consider keeping it plugged in overnight in the winter, which will keep the battery in an ideal temperature range. [2]

11. Wash your car periodically

  • Prevent road salt from damaging your car’s paint by washing your car during the winter.
  • Apply a fresh coat of wax to avoid corrosion.
  • Consider winter floor mats to protect your car’s carpeting.

Along with these maintenance tips, ensure your vehicle has a winter emergency kit and the right auto insurance coverage before you hit the road this winter.

What causes brake failure?

Knowing when to replace your brake pads is important, however, knowing what causes them to fail is equally crucial. If you think your brakes are broken while on the road, do not continue driving. It might cause a serious accident. It’s best to get to the side of the road as safely as possible and get help. To avoid this from happening, here are the most common causes of brake failure that you have to know:

  1. Loss of brake fluid 

The brake fluid provides the force created when you press the brake pedal. This force is applied to each of the brake rotors on the four corners of your car. When pressure is applied effectively, the wheels slow or stop the movement of the car.

If there’s a leak in your brake fluid, it can cause a loss of brake pressure which means your car won’t be able to stop. You’ll know if your brake fluid is leaking when there’s liquid dripping from your engine down to the floor. If you notice a leak, get it repaired and replaced first before driving.

  1. Damaged brake cylinder

The brake cylinder is a hydraulic pump that feeds brake fluid into the brake circuit to convert the pressure on the brake pedal to hydraulic pressure. A bad brake cylinder can cause your braking system to lose power.

If the brake fluid is leaking past the seals inside the cylinder, your brake pedal may feel firm for a moment but it won’t hold steady. You will start to feel it go spongy, and mushy, and may sink far down when pressed.

  1. Bad brake booster

As the name suggests, a brake booster helps to boost the performance of your brakes. This makes it easier for you to brake by increasing the force exerted without the need for the additional force applied on the foot pedal.

If the brake booster fails, it loses the ability to amplify the force from your foot. This means you’ll have to use more effort when stepping on your brake pedal. This can reduce the hydraulic pressure in the brake fluid, making it harder to brake.

5 Signs of a Failing CV Axle

A CV (constant velocity) axle is a critical component in a vehicle’s drivetrain, responsible for transferring power from the transmission to the wheels while allowing for flexible movement. Here are five signs that may indicate a failing CV axle:

  1. Clicking or popping sounds:  One of the most common signs of a failing CV axle is a clicking or popping sound when turning. This noise often occurs during sharp turns and is a result of worn-out or damaged CV joints. The joints may no longer be able to maintain smooth articulation, leading to audible clicking.

  2. Vibration or shaking:  If you experience vibrations or shaking, particularly during acceleration, it could be a sign of a failing CV axle. This typically indicates issues with the CV joint or axle shaft, causing an imbalance that manifests as vibrations when driving.

  3. Grease on the inner edges of the tire: A torn or damaged CV boot can lead to the leakage of grease, which is essential for lubricating the CV joint. If you notice grease on the inner edges of your tires, it may be an indication that the CV boot has failed, and the joint is at risk of damage due to lack of lubrication.

  4. Axle shaft play or excessive play: If there is excessive play or movement in the axle shaft when you try to move it back and forth, it may suggest a problem with the CV joint. A healthy CV joint should not have noticeable play, and any movement may indicate wear or damage.

  5. Difficulty turning or steering: A failing CV axle can result in difficulty turning the vehicle, especially during sharp turns. If you find it harder to steer, or if there’s resistance or a binding feeling when turning, it could be due to a compromised CV joint.

5 BENEFITS OF HAVING A SPARE CAR KEY

Like many other things in life, you don’t realize how much you need a spare key until it’s too late.

It doesn’t come to mind immediately for many of us, but it can be a lifesaver in many situations.

So let’s go over just a few benefits of having a spare car key!

  1. Lockouts: For those of us who have locked ourselves out of our car or home, we know the panic that sets in when we’re locked out. An extra key allows us access if we make the mistake of leaving our keys in our vehicle.
  2. Key Durability: Whether you want to alternate keys monthly to preserve them or save your original and wear down the copy. Having a spare key can keep you from wearing down your original key and can prevent issues down the road.
  3. Convenience This may fall into the category of a first-world problem, but you can prevent the headache of having to change keys between friends and family consistently. Calling a trusted friend is cheaper than calling a locksmith or tow company!
  4. Peace of Mind: A spare car key can provide peace of mind in several ways. Running late for work? Don’t want to leave a friend hanging? Having a spare key can save you the anxiety of running late for anything important. You don’t have to worry about misplacing your original keys in the moment. Even in the worst-case scenario of losing your keys, you’re not entirely out of luck because you have another copy.
  5. Save Money: Last but not least is the financial element of saving money. Having a spare created costs money upfront but can save you tons on the back end. Sometimes, it’s easier and cheaper to make a key if you have a spare compared to starting from nothing. Let’s face the truth. Time = Money. Waiting for a locksmith, not to mention paying for the services, really can add up.

8 Common Radiator Issues

The radiator is a crucial component of a car’s cooling system, responsible for dissipating heat generated by the engine. Common radiator issues can lead to overheating and other problems. Here are some common radiator issues in a car:

Coolant Leaks:

One of the most prevalent problems is coolant leaks. Leaks can occur due to corrosion, aging hoses, or damage to the radiator itself. Puddles of coolant under the car, visible wetness around the radiator, or a drop in coolant levels are signs of a leak.

Corrosion:

Over time, the radiator can corrode both internally and externally. Internal corrosion may lead to blockages, reducing the radiator’s efficiency. External corrosion can cause leaks. Using the recommended coolant and regular coolant flushes can help prevent corrosion.

Clogged Radiator:

Sediment, rust, or debris in the coolant can accumulate in the radiator, leading to clogs. Clogged radiators restrict the flow of coolant and hinder the cooling system’s effectiveness. Flushing the radiator as part of regular maintenance helps prevent clogs.

Faulty Thermostat:

The thermostat regulates the flow of coolant through the radiator. A malfunctioning thermostat may either not open properly, causing overheating, or fail to close, leading to inefficient cooling. If the engine temperature fluctuates or stays consistently high, the thermostat may be a potential culprit.

Broken or Damaged Radiator Fan:

The radiator fan helps cool the radiator by drawing air through its fins. A malfunctioning or broken fan can result in inadequate cooling, leading to overheating. Issues with the fan may include a failed motor, damaged blades, or electrical problems.

Radiator Cap Issues:

The radiator cap maintains pressure within the cooling system. A worn or faulty cap can result in coolant loss, overheating, or air entering the system. Regularly inspect the radiator cap for wear and replace it if necessary.

Fins Damage:

The thin fins on the radiator help dissipate heat. Damage to these fins, whether due to debris impact or corrosion, can reduce the radiator’s efficiency. Gently straightening bent fins can sometimes improve airflow, but severe damage may require radiator replacement.

Radiator Hose Problems:

The hoses connecting the radiator to the engine can deteriorate over time, leading to leaks. Check for visible signs of wear, cracking, or bulging in the hoses, and replace them if needed.

Regular maintenance, such as checking coolant levels, inspecting hoses, and performing radiator flushes, can help prevent some of these issues. If you notice any signs of radiator problems, it’s essential to address them promptly to prevent engine overheating and potential damage

Common Causes of Car Paint Damage

Understanding the common causes of car paint damage is not just about preserving your car’s exterior. It’s about protecting your investment and maintaining your vehicle’s appearance and value. Here are some typical issues and tips on how to fix them.

  1. Road Debris and Rocks
    One of the most common causes of paint damage is road debris, such as small rocks, gravel, and sand. When vehicles kick up these materials, they can strike your paint surface, causing chips and scratches.

    Preventive Tip: Maintain a safe distance from other vehicles, especially on gravel roads, and consider applying a protective film or ceramic coating to vulnerable areas.

  2. Bird Droppings

    Bird droppings contain acids that can quickly etch into your car’s paint if left unattended. The longer bird droppings sit on the surface, the more damage they can cause.

    Preventive Tip: Remove bird droppings promptly with a gentle car wash solution and avoid parking under trees where birds commonly roost.

  3. Tree Sap and Resin

    Parking under trees may provide shade but can expose your car’s paint to tree sap and resin, which are sticky and challenging to remove. These substances can also damage the paint finish over time.

    Preventive Tip: Avoid parking under trees for extended periods, especially during spring and summer when trees are actively producing sap.

  4. Improper Washing Techniques

    Using abrasive sponges, brushes, or harsh cleaning chemicals during car washing can scratch the paint and remove protective wax coatings, leaving the paint vulnerable to damage.

    Preventive Tip: Use soft microfiber towels, a pH-balanced car wash soap, and the two-bucket washing method to minimize swirl marks and scratches.

  5. Automatic Car Washes with Brushes

    Automatic car washes equipped with abrasive brushes can cause scratches and swirl marks on the paint surface, especially if the brushes are not adequately maintained.
    Preventive Tip: Opt for touchless or brushless automatic car washes that use high-pressure water jets instead of physical brushes.

  6. Sunlight and UV Exposure

    Excessive exposure to sunlight and UV rays can cause the paint to fade, oxidize, and lose its gloss over time. This is especially true for cars parked outdoors regularly.

    Preventive Tip: Park your car in shaded areas whenever possible or use a car cover to protect it from direct sunlight.

  7. Salt and Road Chemicals

    Salt used for de-icing roads during winter can accelerate corrosion and paint damage, especially on the lower panels of the vehicle.

    Preventive Tip: Wash your car regularly during winter months to remove salt and road chemicals from the paint surface and undercarriage.

  8. Accidental Scratches and Dents

    Everyday incidents such as parking lot dings, scratches from keys or objects, and minor collisions can lead to paint damage if addressed.