Back to school safety reminders for parents, students and drivers

As summer comes to an end and a new school year begins, the excitement of fresh supplies, new teachers, and reconnecting with friends fills the air. But with the back-to-school rush also comes an important responsibility: safety. Whether you’re a parent, student, or driver, taking a few precautions can help ensure that everyone starts the year on the right foot.

Safety Tips for Parents

  • Plan the route: Walk or drive your child’s route to school or the bus stop ahead of time, pointing out safe crossings and potential hazards.

  • Set a routine: Establish consistent morning and afternoon schedules to avoid rushing, which can lead to accidents.

  • Practice safe drop-offs: Use designated school drop-off zones and never let children exit into traffic.

  • Talk about stranger safety: Remind children not to talk to or accept rides from strangers.

Safety Tips for Students

  • Be alert near traffic: Always use sidewalks and crosswalks. Look left, right, and left again before crossing the street.

  • Avoid distractions: Put away phones and headphones when walking to or from school.

  • Bus safety: Wait for the bus to stop completely before approaching, and always cross in front of the bus where the driver can see you.

  • Buddy system: Younger children should walk with a sibling, friend, or trusted neighbor.

Safety Tips for Drivers

  • Slow down: School zones have lower speed limits for a reason. Children can be unpredictable near roads.

  • Be patient at drop-off/pick-up: Follow school staff directions and avoid double parking.

  • Watch for buses: Stop when red lights are flashing and children are loading or unloading.

  • Stay distraction-free: Never text or use your phone while driving, especially in school areas.

Final Reminder

Back-to-school season should be filled with excitement, not worry. By staying alert, planning ahead, and following these safety reminders, parents, students, and drivers can work together to create a safer community for all.

How Heatwaves Affect Your Car’s Paint — And What You Can Do About It

When summer heatwaves roll in, most drivers think about their air conditioning — but there’s something else at risk: your car’s paint. Prolonged exposure to extreme heat and UV rays can do serious damage to your vehicle’s exterior, especially during intense heatwaves like the ones hitting New Jersey this summer.

Here’s how heatwaves affect your car’s paint, and what you can do to protect your investment.


☀️ 1. Fading and Oxidation

Direct sunlight during heatwaves accelerates paint fading. UV rays break down the molecules in your car’s paint and clear coat, leading to a dull or chalky finish — especially if your vehicle is a darker color.

Oxidation can also occur, giving your paint a cloudy or milky appearance over time.

Prevention Tip: Park in shaded areas or use a car cover. Regularly apply wax or ceramic coatings to add a layer of UV protection.


🔥 2. Clear Coat Damage

The clear coat is your car’s first defense against the elements. Extreme heat can cause this protective layer to dry out and crack, especially if the paint hasn’t been maintained.

Once the clear coat fails, your paint is exposed to the elements, leading to rapid deterioration.

Prevention Tip: Schedule regular detailing. Reapplying protective coatings (wax, sealants, or ceramic) every few months helps extend the life of your clear coat.


🌡️ 3. Expansion and Contraction

Heat causes materials — including your vehicle’s body panels and paint — to expand. At night, cooler temperatures cause them to contract. This cycle of expansion and contraction can cause minor cracking in the paint over time, especially in older cars or areas with existing damage.

Prevention Tip: Get chips and scratches repaired quickly. These small imperfections become vulnerable spots during temperature fluctuations.


🚗 4. Interior Heat Can Exacerbate Exterior Issues

You might not think of your car’s interior affecting the exterior, but prolonged heat trapped inside your car can impact your window seals, causing them to dry out and shrink. This leads to potential leaks and more UV exposure inside and around windows.

Prevention Tip: Tint your windows and use a windshield sunshade to reduce internal heat buildup.


🧼 5. Washing Your Car During a Heatwave? Be Careful

Washing your car during extreme heat can actually damage the paint if done improperly. Water and soap can dry too quickly, leaving behind stains and streaks, or even burning into the surface.

Prevention Tip: Wash your car in the early morning or evening, when temperatures are lower, and always dry it properly.


🛡️ Final Thoughts

A heatwave doesn’t just test your patience — it tests your car’s durability. Protecting your paint isn’t just about looks; it’s about preserving your car’s value and preventing expensive repairs down the road.

At Clifton Auto Repair & Tire Services, we offer professional detailing, paint protection, and repair services to keep your car looking sharp — no matter how hot it gets.

Tips for a Safe and Fun Memorial Day Road Trip in New Jersey

Memorial Day weekend marks the unofficial start of summer — and in New Jersey, it’s the perfect time to hit the road and enjoy everything from the Jersey Shore to scenic mountain getaways. Whether you’re headed to Cape May, the Poconos, or just out for a beach day, here are essential tips to make your drive safe, smooth, and stress-free.


1. Plan Ahead and Leave Early

Traffic on Memorial Day weekend in NJ can be intense — especially on the Garden State Parkway and NJ Turnpike. Avoid the gridlock by:

  • Leaving early in the morning or late in the evening.

  • Using apps like Google Maps or Waze to check real-time traffic.

  • Having a backup route just in case.


2. Prep Your Vehicle

Before heading out, make sure your car is road-trip ready:

  • Check your tires, brakes, oil, and fluids.

  • Make sure your AC works — it can get hot fast.

  • Have an emergency kit: jumper cables, water, flashlight, phone charger.


3. Fuel Up Before You Go

Gas prices often spike during holiday weekends. Consider:

  • Filling up a day or two early.

  • Using apps like GasBuddy to find the cheapest gas nearby.

  • Avoiding fueling up near major highways or shore towns — they tend to be more expensive.


4. Drive Safe and Stay Alert

New Jersey State Police will be out in full force this weekend, so:

  • Follow speed limits, especially in work zones.

  • Don’t drive distracted — keep phones on hands-free.

  • Take breaks every 2-3 hours to rest and stay alert.


5. Pack Snacks and Entertainment

Whether you’re traveling with kids or adults, make the ride more fun:

  • Bring a cooler with drinks, snacks, and sandwiches.

  • Download playlists or podcasts ahead of time (in case of spotty service).

  • Keep games or books handy for the passengers.


6. Know Where You’re Going

Whether you’re heading to:

  • Point Pleasant or Seaside Heights for boardwalk fun,

  • The Delaware Water Gap for hiking and rivers,

  • Or Wildwood or Cape May for beach relaxation…

Make sure to check weather reports, parking rules, and beach badge requirements in advance.


7. Respect the Holiday

Memorial Day is about honoring those who served. If possible:

  • Visit a local veterans’ memorial.

  • Participate in a parade or community service.

  • Take a moment of silence with your family to reflect and remember.


Final Thoughts

New Jersey offers endless options for a memorable Memorial Day weekend — from beaches to mountains, parks to downtowns. With a little preparation and some smart driving, you can enjoy the ride and make the most of your getaway.

Safe travels and happy Memorial Day! 🇺🇸

Frame Damage: What It Means and How It’s Fixed

The frame is the structural foundation of your car. Think of it as the skeleton that supports every other part—engine, transmission, suspension, and body panels. Frame damage occurs when the underlying structure is bent, cracked, or otherwise compromised due to a collision or impact.

There are two main types of frames:

  • Unibody frames (common in most modern cars): The frame and body are a single unit.

  • Body-on-frame (mostly found in trucks and SUVs): The body is mounted on a separate frame.

Damage to either type can affect how your car drives, how it protects you in another crash, and even its resale value.


 Why Frame Damage Is a Big Deal

Frame damage isn’t just cosmetic—it can affect:

  • Alignment and handling

  • Tire wear

  • Crash safety performance

  • Door and panel alignment

  • Vehicle stability at high speeds

In short, if your car’s frame is compromised, everything else can be too.


 How Frame Damage Is Diagnosed

At a professional auto body shop, frame damage is diagnosed using:

  • Visual inspection

  • Measuring systems that compare your car’s dimensions to manufacturer specs

  • Computerized diagnostics to detect misalignment or stress points

This step is crucial because some damage isn’t visible to the naked eye—especially after a serious accident.


 How Frame Damage Is Repaired

Repairing frame damage is a highly technical process and should always be done by experienced professionals. Here’s how we typically fix it:

  1. Realignment – Using specialized equipment, the frame is pulled or pushed back into factory specifications with millimeter precision.

  2. Section replacement – In some cases, severely damaged parts of the frame may need to be cut out and replaced with new sections.

  3. Reinforcement & welding – Cracks are welded, and reinforcements are added to restore structural integrity.

  4. Final inspection & testing – The vehicle is tested to ensure it’s structurally sound and safe to drive.


 Is It Worth Fixing Frame Damage?

It depends on:

  • The extent of the damage

  • The value of your car

  • Insurance coverage

Sometimes the cost of repairs can exceed the value of the vehicle—this is when insurance companies may “total” the car. But in many cases, especially with newer vehicles, professional frame repair can restore the car’s performance and safety.

Causes of Tire Wear on Electric Vehicles

As electric vehicles (EVs) become increasingly popular, many drivers are noticing that tire wear can be more significant compared to traditional gas-powered cars. While EVs offer impressive acceleration, environmental benefits, and lower maintenance costs, tire wear is a concern that shouldn’t be overlooked. Understanding the causes can help EV owners take proactive steps to extend tire life and ensure safety.

1. Increased Vehicle Weight

One of the primary causes of accelerated tire wear in EVs is their weight. EVs typically weigh more than internal combustion engine (ICE) vehicles due to their large battery packs. This added weight puts more pressure on the tires, especially during cornering, braking, and acceleration. Heavier loads increase friction between the tire and the road, which can cause the tread to wear down faster.

2. Instant Torque and Acceleration

Electric motors deliver power instantly, resulting in rapid acceleration. While this offers a thrilling driving experience, it can also lead to increased tire wear. The immediate torque can cause more stress on the tire tread—especially the front tires in front-wheel-drive EVs and rear tires in rear-wheel-drive models. Frequent hard acceleration can reduce tire lifespan significantly.

3. Regenerative Braking

Regenerative braking systems, which convert kinetic energy into electrical energy to recharge the battery, are a key feature of EVs. However, they also affect tire wear. Depending on how the regenerative system is set up, it may put more load on certain tires during deceleration, leading to uneven wear patterns if not managed properly.

4. Tire Type and Design

Not all tires are created equal. Many EVs come equipped with low rolling resistance tires to maximize range. While these tires help improve efficiency, they often compromise on tread life and durability. Additionally, tires designed for EVs need to support heavier loads and withstand higher torque. Using standard tires not built for electric vehicles can accelerate wear.

5. Driving Habits

Driving style plays a significant role in how quickly tires wear down. Aggressive driving—frequent acceleration, sharp turns, and hard braking—can shorten tire life. Smooth and moderate driving, especially in urban environments where stop-and-go traffic is common, can help reduce the rate of wear.

6. Improper Tire Maintenance

Failing to regularly check tire pressure, rotate tires, and align wheels can result in uneven wear. Underinflated tires increase rolling resistance and cause more surface contact with the road, leading to faster tread wear. Because of the added strain EVs put on tires, consistent maintenance is even more important than with traditional cars.

7. Road Conditions

Just like with any vehicle, road conditions heavily influence tire wear. Potholes, rough surfaces, and uneven roads can contribute to irregular tread patterns and premature tire damage. EV drivers should be extra cautious because the added weight and instant torque amplify the effects of poor road conditions.

Do Small Scratches Really Need to Be Repaired?

We’ve all been there—you come out of a store, glance at your car, and notice a small scratch on the door. It’s barely noticeable, and the paint isn’t even chipped that badly. You might wonder, “Is it really worth fixing?”

Short answer: yes—and here’s why.

1. Small Scratches Can Lead to Bigger Problems

Even the tiniest scratch can break through your vehicle’s clear coat—the protective layer that guards against moisture, rust, and UV damage. Over time, this exposure can lead to:

  • Rust and corrosion

  • Paint fading or peeling

  • Weakened body panels

What starts as a minor surface blemish can become a more expensive issue if left untreated.

2. Your Car’s Value Could Take a Hit

If you ever plan to trade in or sell your vehicle, even small scratches can impact your resale value. A scratched-up surface makes the car look poorly maintained—even if it runs perfectly. Buyers (and dealerships) notice everything.

3. It’s Often Cheaper to Fix Than You Think

Thanks to modern repair techniques like paint touch-ups and paintless scratch repair, many minor scratches can be handled quickly and affordably—sometimes without needing to repaint an entire panel.

At our shop, we offer free estimates, and we’ll always tell you if a scratch is just cosmetic or something to take more seriously.

4. It Keeps Your Ride Looking Sharp

Let’s be honest—your car is a reflection of you. Taking care of those little scratches keeps it looking clean, fresh, and cared for. Whether it’s your daily driver or your weekend cruiser, maintaining that sleek look matters.

5. DIY Isn’t Always the Answer

Sure, you can find tons of scratch repair kits online—but not all scratches are created equal. What works on one car may not match the paint tone of yours, and improper touch-ups can make the scratch look worse. Let the pros handle it—we’ve got the tools, paint matching technology, and experience to do it right.

Bottom Line

Don’t ignore small scratches! Getting them fixed early can save you money in the long run, keep your car looking great, and protect it from further damage. If you’re not sure how serious your scratch is, bring it by—we’ll take a look and give you honest advice.

What Is a Serpentine Belt?

You probably know that your car has a serpentine belt, but do you know what it does? The serpentine belt transfers power from the crankshaft to many components in your car’s engine. It’s important to know how it works and the symptoms of a bad serpentine belt so you can keep your car running more smoothly and efficiently.

What does a serpentine belt do?

The serpentine belt wraps around various pulleys inside the engine to help transfer power from the crankshaft to different accessories such as the alternator, power steering pump, air conditioner, and possibly the water pump in the cooling system. 

Serpentine belt vs. timing belt

In your car, the serpentine belt and the timing belt have different functions.  The serpentine belt helps the engine parts run smoothly.

The timing belt is located inside the car’s engine and keeps the crankshaft and camshaft synchronized.  Keeping them in sync allows the intake and exhaust valves to operate properly, and in turn keeps the engine running smoothly.

Look closely at the grooves on the belts to tell the difference between them. The serpentine belt has V-shaped grooves that run vertically, while the timing belt has horizontal grooves fit to the cogwheels of the crankshaft and camshaft.

How long does a serpentine belt last?

The good news is that your serpentine belt typically doesn’t need to be changed often. It’s recommended to get it checked and possibly replaced every 60,000 to 100,000 miles. Check your owner’s manual if you want a more specific recommendation for your car.

Risks of driving with a broken serpentine belt

While it’s possible to drive on a snapped serpentine belt, it’s very dangerous and not recommended that you do so. It can make steering the car very difficult if not impossible. Take or tow your car to a professional and have them replace it as soon as possible.

Identify these bad serpentine belt symptoms

To catch a bad serpentine belt as soon as possible and avoid further damage, look out for these signs:

  1. High-pitched noises: When your belt is misaligned, it will emit a squeal from under the hood.
  2. Problems with your A/C: When the belt gives out, the A/C system becomes nonfunctional.
  3. Overheating engine: Your belt can stop the water part from functioning, which supplies coolant to the engine. When this happens, the engine can overheat.
  4. Check engine light: When your belt is on its last legs, the check-engine light can come on.

What causes a serpentine belt to break?

Several factors can cause a serpentine belt to snap:

  1. An already weak belt: If your serpentine belt is older and made from neoprene rubber, it can break earlier.
  2. Oil leaks: If your belt is soaked with oil, it can break.
  3. Misaligned pulleys: If the pulleys aren’t aligned correctly, the belt can wear out faster than expected.

Tools and tips to safely replace a serpentine belt

While it’s not that difficult to replace your own serpentine belt, if you aren’t sure how to do it yourself, it’s recommended to take your car to a professional. If you have the tools and knowledge to do it yourself, here are the steps you should take:

  1. Check the placement of the serpentine belt in your engine.
  2. Examine the tension of the worn serpentine belt.
  3. Remove the belt by loosening it and unthreading it.
  4. Check the old belt for any damage.
  5. Ensure that every pulley is aligned correctly.
  6. Install the belt by using a belt replacement tool.

Serpentine belt replacement cost

A professional mechanic can typically charge between $75 and $120 to replace your serpentine belt. Keep in mind that the cost of a serpentine belt depends on the current inflation rate as well as your location. Always get an estimate from your mechanic on costs associated with your car parts.

Replacing your serpentine belt when needed isn’t the only important maintenance task to perform on your car. Use this maintenance checklist to keep up with the various time-sensitive checks and changes that your vehicle needs to run at its best. Lastly, make sure you have the proper auto insurance to cover yourself and your car.

5 Easy Ways to Prepare Your Car for Spring

Preparing your car for spring can save you a lot of headaches later in the year. It can even save you money! Spring auto maintenance will get you ready for a summer filled with long drives and vacations. Whether you’re heading to the beach or your child’s ball game, you’ll be glad you took the time to prepare your car for spring.

Visit a Car Wash

Spring cleaning isn’t only for your house. The winter especially can be tough on cars. Freezing temperatures and salt from the road can do real damage to your paint job, so make sure to start the season with a car wash. If you go to a carwash, spring for premium, because you won’t want to miss any nooks or crannies. If you do it yourself, make sure to add baking soda to the wash water if your car has a strong salt buildup. This will help neutralize the salt and save your paint job.

Check Your Tires

Did you know you can save money on gas by making sure your tires are filled up to the manufacturer recommended air pressure? Just by keeping the pressure regulated, your car is better able to distribute and conserve gasoline. The cold air and ice can be rough on the air pressure in your tires, so the Spring is a great time to check those tires. Make sure your tires are rotated regularly and don’t wait until you have a visible flat to fill them up. Check your tires for worn tread and make sure to replace your tires when the treading becomes too worn.

Replace Wiper Blades and Fluids

Snow can damage and wear on your windshield wipers. If your wipers are streaking, replace them. New wiper blades are inexpensive and simple to replace, so you won’t even need to pay someone to do it for you. You should also make sure to top off your windshield wiper fluid and reapply any needed windshield treatments to repel water and rain.

Check Your Battery

At the end of a long winter, you’ll want to be sure to evaluate your car’s electrical system. Many parts shops have free battery checks where you can find out just how strong your battery is.  If your battery is getting weak, you can prevent future problems by replacing it before it stops working. That way, you won’t be left stranded with a dead battery.

Change Your Oil

Regular oil changes can make all the difference in making sure your car has a long, healthy life. Make sure to follow the manufacturer’s suggestions for oil change intervals and oil viscosity, and make sure to change the oil filter as well. Some car shops offer fluid top offs, tire checks, battery checks, and even tire rotation included their oil change prices, so you can take care of almost all of your spring maintenance in just one stop.

What Is Power Steering Fluid?

Like all fluids in your vehicle, power steering fluid plays an important and specific role in keeping your car operating at peak performance. This fluid is critical for providing the steering system with hydraulic assistance so you can turn your vehicle’s steering wheel easily. It also helps lubricate the power steering pump and the steering components. Power steering fluid even prevents corrosion. Because this fluid serves various purposes, you can see why it’s important to use the right kind.

Where is the power steering fluid located?

When you’re looking for the power steering fluid under the hood, check the passenger side of the vehicle, and you should be able to spot the reservoir. The power steering fluid is usually in a white or yellow container with a black cap labeled “power steering” or “steering fluid.”

How to check power steering fluid

If you hear a whining sound coming from your hood when you turn or if it’s becoming more difficult to turn, your car might be running low on power steering fluid.

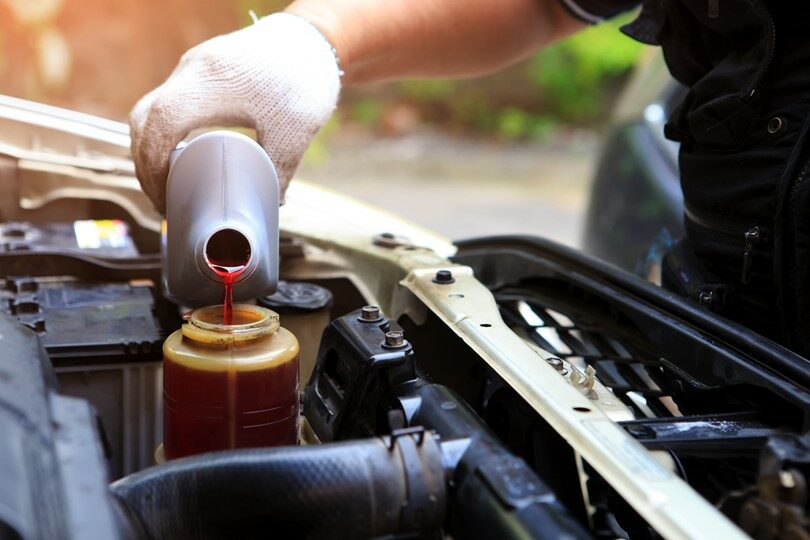
Before checking your car’s power steering fluid, warm the engine to a normal operating temperature by turning the steering wheel in one direction until it stops. Next, turn the wheel all the way in the opposite direction. Repeat this process several times, then follow the steps below:

  1. Turn off the engine.
  2. Wipe the power steering reservoir and cap clean with a cloth.
  3. Check the dipstick attached to the reservoir to see the fluid level, then wipe it clean.
  4. If the fluid level is below the MIN line, add new fluid, careful not to exceed the MAX line.
  5. Examine the quality of fluid in the reservoir.

What color is the power steering fluid?

Most power steering fluid is red, amber, pink, or clear. If the fluid is lighter, it doesn’t contain any debris and is okay to use. It likely needs to be changed if it’s dark brown or foamy.

What does power steering fluid do ?

Power steering fluid is a hydraulic fluid used in the steering system to decrease the effort required to turn the wheels. It also lubricates the moving parts within the steering system and prevents corrosion in the power steering gear to keep the vehicle working optimally.

How often do I need to replace power steering fluid?

On average, your car needs a power steering fluid flush every 40,000 to 80,000 miles. Your recommended flush routine depends on your vehicle because the steering system and fluid needs vary by car. Check your owner’s manual for specific manufacturer recommendations.

Can you drive without power steering fluid?

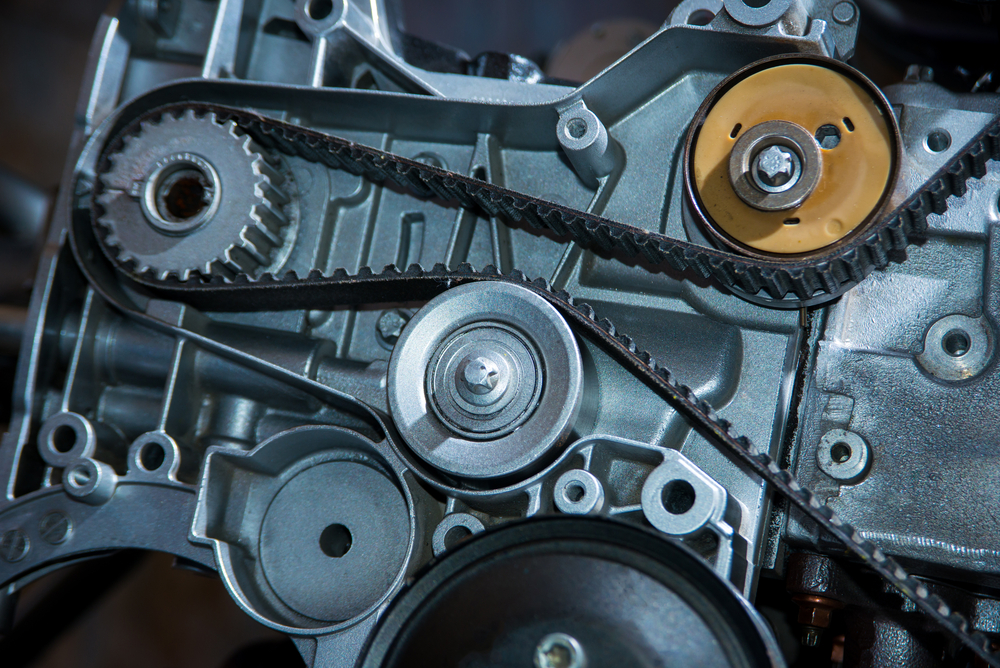
When you drive without power steering fluid, you need to exert more force when turning the wheel, and the steering is much heavier. If you wait a long time before filling your car with power steering fluid, damage to the steering pump becomes inevitable. When the pump vanes lack lubrication, the risk of damaging the drive belt increases. The shaft and rack seal can also break down without power steering fluid.

Cons of driving without power steering fluid:

  • Noisy steering
  • Jerky or jumpy power steering
  • Difficulty turning the steering wheel
  • Stains or puddles under the vehicle
  • Locked steering wheel

Types of power steering fluid

  • Automatic transmission fluid (ATF): The same fluid used for automatic transmissions can be used in some power steering systems.
  • Synthetic power steering fluid: A fluid usually engineered for specific types of cars or steering systems. Most newer vehicles use synthetic fluid created in a lab.
  • Nonsynthetic mineral power steering fluid: Mineral hydraulic fluid may be used in some instances that accept ATF.

Which power steering fluid is right for your car?

No single rule applies when it comes to power steering fluids for cars. Instead, take time to review your owner’s manual, do some online research, or check with your dealership’s service department to ensure that the fluids you’re using are right for your car.

Power steering fluid substitutes

Can you use brake fluid for power steering fluid?

Using brake fluid in the power steering system will damage your car. Both fluids may have been similar in the past, but now they are very different and should only go in their designated systems.

Can you use transmission fluid for power steering fluid?

It gets a little trickier when deciding if you can use automatic transmission fluid instead of power steering fluid. You want to ensure you’ve done your homework on this one before you consider swapping out fluids. While some systems were designed to use automatic transmission fluid, others require that you use only steering wheel fluid.

Before doing car maintenance on your own, check your owner’s manual to see what the car manufacturer recommends. It should specifically state in the manual which fluid to use. Some models require specific fluid types, such as synthetics, so it’s worth taking the time to track down the correct information. If you can’t find your owner’s manual, contact a car mechanic or car dealership and talk to the service department.

Using the wrong type of fluid can cause damage to some seals, plastic, and rubber components inside your vehicle. And, if it doesn’t mix well with the fluid you’re adding it to, it could create an acidic reaction.

Adding power steering fluid isn’t the only important maintenance task to perform on your car. Use this maintenance checklist to keep up with the various time-sensitive checks and changes your vehicle needs to run at its best.

When and how to check and change your gear oil and filter

Your gear oil is constantly working to reduce the stresses placed on your gearbox, keeping it operating at its peak. But like most lubricants, it may eventually need to be changed, otherwise the slow accumulation of deposits can end up clogging your oil gearbox filter and potentially damaging its components, resulting in costly repairs.

In this guide, view simple, step-by-step instructions on when and how to check and change your gear oil and filter, ensuring your gearbox keeps working its best.

When should I change my gearbox oil and filter?

If your vehicle or machinery doesn’t have an oil life monitoring system that automatically alerts you when your gear oil requires changing, knowing when to change your gear oil and filter can be an imperfect science, but there are guides for different types of vehicles:

  • Manual gearboxes usually require a gearbox oil change every 30,000 to 50,000 mi (48,000 to 80,000 km).
  • Automatic gearboxes usually have gear oil change intervals of between 60,000 to 100,000 mi (96,000 to 160,000 km).
  • It’s advisable that you change your gearbox oil filter at the same time as your oil.
  • If you have a gearbox leak repaired, then always change your oil after the repair to ensure it’s fully topped up.

How to check gearbox oil level

Because these ranges are so large, a good way to gauge your oil health is to check its colour. New oils are brightly coloured (usually red) and semi-transparent, but as they degrade or accumulate deposits, they turn a darker shade, lose their transparency and can smell burnt due to oxidation.

To check your gearbox oil:

  1. Open the bonnet and locate the transmission dipstick (its location should be shown in your owner’s manual). If your model doesn’t have one, you will probably have to raise your car using a jack or lift, then carefully remove the transmission fill cap located on the transmission assembly.
  2. Pull the dipstick out of the filler tube. If you have raised your car, insert a ruler, screwdriver or other implement into the system to sample the oil.
  3. Check the colour of the oil.

If your oil is dark brown, black, or light pink (usually due to water contamination), then you need to change it. Red-brown, semi-transparent fluid is often slightly degraded, but doesn’t necessarily signify a need for a change.

How to change your gear oil

If you don’t have much experience in vehicle or machinery maintenance, it’s a good idea to get a professional to change your gear oil. If you want to do it yourself, follow these steps:

  1. If your vehicle or machinery has a drain hole, locate it and place a catch pan beneath it. If not, place a catch pan underneath the entire gearbox assembly.
  2. Unscrew the drain bolt or remove the gearbox pan, then let all the fluid drain into the catch pan.
  3. Remove the old gasket and filter, with replacement components to hand.
  4. Inspect the gearbox pan, cleaning the magnet of any small pieces of metal. If large fragments are present, your gears may be very worn and require replacement.
  5. Install the new gasket and filter, then bolt the pan back on to the machinery or vehicle.
  6. Get the right gear oil for your vehicle or machinery
  7. Check how much fluid your gearbox requires in your owner’s manual.
  8. Put the correct amount of fluid into your gearbox using an oil pump or pour in the correct amount after measuring it out.
  9. Let the oil settle for a few minutes, then start the engine and run the vehicle for a short time.
  10. Check the oil level to ensure it’s correct
  11. Dispose of the oil responsibly

These instructions are only meant as a guide – vehicles and equipment may be designed differently, so always check your owner’s manual. If you are unsure of how to change your gearbox oil, always use a professional.