5 Tips on How to De-Ice Your Windshield & Keep Ice Off of It

Winters are unkind to drivers. Slick roads, waiting several minutes for your car to warm up in the frigid weather, and trying to keep snow, sleet, and freezing rain off your windshield.

Today’s blog showcases how to de-ice your windshield and keep the ice off as you drive to your destination.

Ice Scraper

Your primary tool is an ice scraper for removing ice on your windshield. Purchase a plastic and not a metal one because metal can scratch the glass and damage the wiper blades.

Start with the edges of your windshield rather than the middle. If you start in the middle, you may be tempted to pound your way to the windshield to get an edge underneath the ice. Rather than using force, use heat to loosen the ice.

Car Defroster

The key to heating your windshield comes from your vehicle’s defroster. Before you lift your scraper, start your car’s engine, set the air conditioning to defrost, and set it to recirculate. Set the controls to full heat. As your engine warms up, the heat will get more intense.

Eventually, the ice against your windshield will soften. Then you can get your scraper’s edge against your windshield and remove the ice. Go slowly and smoothly to prevent ice chips from spraying around your eyes and face.

Patience

The key to this process is patience. It may take 10 to 15 minutes for your vehicle’s heater to get warm enough to start melting the ice. Then, it could take another few minutes for the ice against the windshield to become soft enough to scrape the ice off.

However, this method will reduce the physical effort required to de-ice your windshield. It might even take more time to exert yourself while trying to get through the ice on your windshield than waiting for your heater to get warm. The trick is to leave enough time (maybe an extra 20 to 30 minutes) to de-ice your windshield before starting out on your trip.

Once you clear your windshield of ice, you need to keep it clear.

De-Icing Fluid or Spray

You can purchase de-icing fluid that goes in your windshield wiper fluid reservoir under the hood. However, that doesn’t work if your windshield has ice on it. Set some aside, fill up a spray bottle, and spray it on your windshield to loosen some of the ice. This method works because the de-icing fluid has a lower freezing point than water. Once the ice is loose, scrape it away.

Rock Salt Spray

Although not as effective as commercially available de-icing fluid, you can fill a spray bottle with water and add a few scoops of rock salt. The rock salt will lower the freezing point of the ice, allowing you to get under the ice more easily than without it.

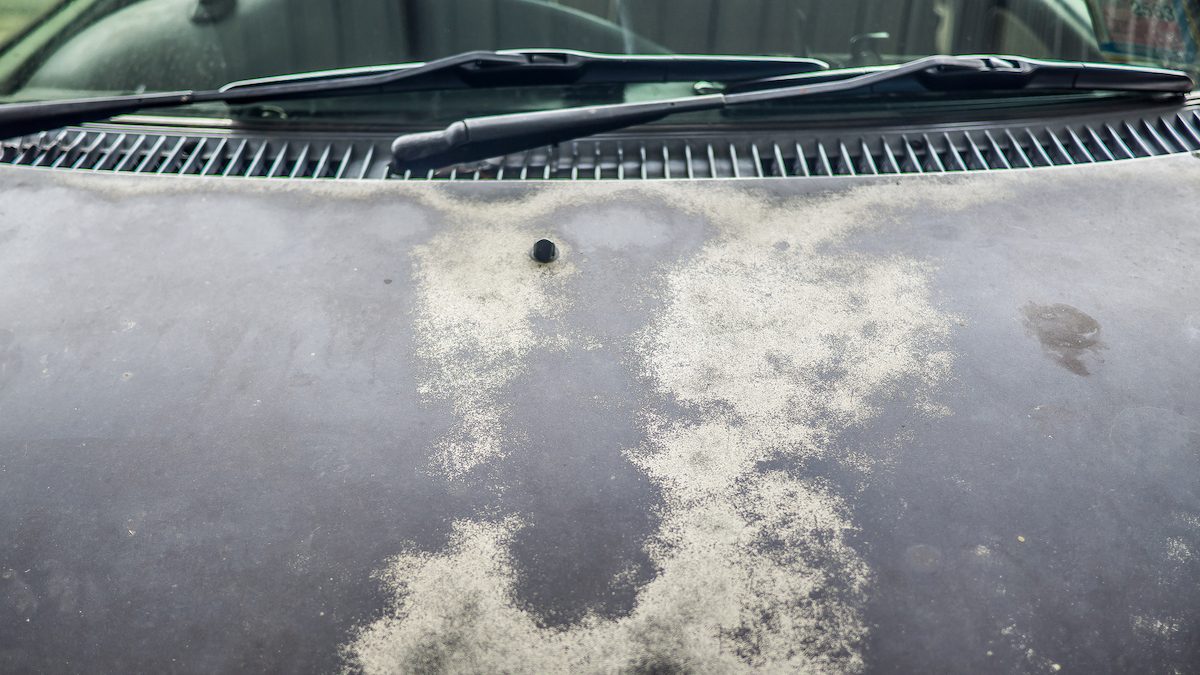
Keeping Ice Off Your Windshield Once It’s Gone

There are two keys to keeping ice off of your windshield while driving. First, keep your defroster on hot, even at a low setting. This will keep your windshield from fogging up. Second, use your windshield wipers to keep snow, sleet, or freezing rain from cluttering your view and covering the glass.

If your car is parked outside, use a windshield cover to protect your wiper blades. They range in price from $10 to $30. If not, cover your windshield with a large towel or tarp. Before putting it on your windshield, soak the cover in diluted saltwater to prevent the cloth from freezing to the windshield if the precipitation starts as a liquid and then freezes.

How NOT to De-Ice Your Windshield

There are some ways not to de-ice your windshield, even though you may think they are convenient. Do not use hot or boiling water to de-ice your windshield. Not only will the water refreeze and make the icy windshield worse, but the sudden hot temperatures could crack your windshield due to thermal shock.

One DIY remedy includes a mix of vinegar and water. But this doesn’t work well since vinegar can corrode chrome and your vehicle’s paint job. Worse, vinegar may cause micro-pitting on the windshield glass, meaning very small holes could form. Over time, as more debris lands on the windshield at high speed, cracks could form more readily.

Why Did My Gas Gauge Stop Working?

Have you ever found yourself on a long drive, glancing nervously at the gas gauge as it sits dangerously close to empty? You’re not alone.

But what happens when the gas gauge stops working? It’s a scenario we’d all rather avoid, but it’s better to be prepared. Understanding how our vehicle’s gas gauge works and why it may stop working is essential knowledge for any driver. This article will delve into the common causes of gas gauge failure, providing practical advice and precautionary measures to help you avoid such situations.

What is a gas gauge and how does it work?

The gas gauge — an essential component in your vehicle — plays a vital role in alerting you when it’s time to refuel. It’s part of a complex system made of 3 main components: the gauge, the sender, and the circuit. These components work together to keep you informed of how much fuel is left in your tank. But problems can occur.

Common gas gauge problems

The most common causes of faulty gas gauges include sending unit failure, a blown fuse, circuit problems, and instrument cluster failure. We’ll discuss each in detail below.

Bad fuel sending unit

A faulty fuel gauge resistor in the sending unit can send full voltage to the fuel gauge at all times, causing it to read as full regardless of the actual fuel level. Other symptoms of a faulty fuel-sending unit include a fuel gauge getting stuck on empty or full and the fuel gauge behaving erratically. It’s like having a broken watch that either always reads 12 o’clock or jumps from time to time randomly.

Blown fuse

One common cause of a blown fuse is corrosion. Over time, elements such as moisture and salt can cause corrosion, leading to electrical issues that can blow a fuse. Once the fuse for the instrument panel is blown, it can affect the fuel gauge, making it read incorrectly or not at all.

Corroded wires and circuit issues

Corroded wires are typically caused by exposure to moisture, chemicals, or environmental factors such as salt or pollution. When corrosion occurs, it can lead to voltage and current flow degradation. When corrosion interferes with the electrical flow in your vehicle’s wiring, it can cause the gas gauge to read incorrectly.

Circuit issues can also lead to problems with your gas gauge. These issues could stem from a lack of source voltage or an interrupted ground. If the circuit delivering information between the sending unit (fuel level sensor) and the gas gauge is interrupted, the gauge may provide inaccurate readings. One common cause of circuit problems is poor-quality wire insulation.

Instrument cluster failure

Instrument cluster failure is the least common cause of gas gauge failure. However, if it does occur, it’s often the most expensive problem to fix. This is because modern instrument clusters are fully integrated circuits and may not even feature replaceable bulbs. If the gas gauge fails as part of the cluster, the entire unit must be replaced.

Can you drive with a faulty gas gauge?

The most obvious risk of driving with a faulty gas gauge is running out of fuel unexpectedly. This could potentially leave you stranded on the side of the road. More than the inconvenience of being stuck, running your vehicle on low fuel can cause the fuel pump to overheat.

Also, if your gas gauge isn’t working properly, allowing your tank to be constantly close to empty, debris can settle at the bottom of your fuel tank and cause problems with your fuel system.

How to fix a gas gauge

There are several tests to check the gas gauge. Be sure to consult with a professional if you’re not experience with safe vehicle maintenance practices. They include:

  • Instrument cluster self-test: Turn the ignition switch on but don’t start the engine. Press and hold the odometer reset button. After a few seconds, the gauges and lights on the instrument panel will go through a series of checks. Pay close attention to the fuel gauge during this process. If it does not move or behaves erratically, there might be an issue with the instrument cluster.
  • Fuel sender unit test: Disconnect the wire that runs from the sender unit to the gas gauge. Ground this wire and turn on the ignition. If the gas gauge moves to the full position, the sender unit could be faulty.
  • Voltage test: Using a multimeter set to 20V DC, test the wiring going to the gauge. If it’s not receiving 12 volts, the gauge could be faulty.
  • Ground wire test: Check the ground wire and ensure that it’s properly connected. If this wire is loose or disconnected, it can cause the gas gauge to give inaccurate readings.

5 Signs of a Failing CV Axle

A CV (constant velocity) axle is a critical component in a vehicle’s drivetrain, responsible for transferring power from the transmission to the wheels while allowing for flexible movement. Here are five signs that may indicate a failing CV axle:

  1. Clicking or popping sounds:  One of the most common signs of a failing CV axle is a clicking or popping sound when turning. This noise often occurs during sharp turns and is a result of worn-out or damaged CV joints. The joints may no longer be able to maintain smooth articulation, leading to audible clicking.

  2. Vibration or shaking:  If you experience vibrations or shaking, particularly during acceleration, it could be a sign of a failing CV axle. This typically indicates issues with the CV joint or axle shaft, causing an imbalance that manifests as vibrations when driving.

  3. Grease on the inner edges of the tire: A torn or damaged CV boot can lead to the leakage of grease, which is essential for lubricating the CV joint. If you notice grease on the inner edges of your tires, it may be an indication that the CV boot has failed, and the joint is at risk of damage due to lack of lubrication.

  4. Axle shaft play or excessive play: If there is excessive play or movement in the axle shaft when you try to move it back and forth, it may suggest a problem with the CV joint. A healthy CV joint should not have noticeable play, and any movement may indicate wear or damage.

  5. Difficulty turning or steering: A failing CV axle can result in difficulty turning the vehicle, especially during sharp turns. If you find it harder to steer, or if there’s resistance or a binding feeling when turning, it could be due to a compromised CV joint.

8 Common Radiator Issues

The radiator is a crucial component of a car’s cooling system, responsible for dissipating heat generated by the engine. Common radiator issues can lead to overheating and other problems. Here are some common radiator issues in a car:

Coolant Leaks:

One of the most prevalent problems is coolant leaks. Leaks can occur due to corrosion, aging hoses, or damage to the radiator itself. Puddles of coolant under the car, visible wetness around the radiator, or a drop in coolant levels are signs of a leak.

Corrosion:

Over time, the radiator can corrode both internally and externally. Internal corrosion may lead to blockages, reducing the radiator’s efficiency. External corrosion can cause leaks. Using the recommended coolant and regular coolant flushes can help prevent corrosion.

Clogged Radiator:

Sediment, rust, or debris in the coolant can accumulate in the radiator, leading to clogs. Clogged radiators restrict the flow of coolant and hinder the cooling system’s effectiveness. Flushing the radiator as part of regular maintenance helps prevent clogs.

Faulty Thermostat:

The thermostat regulates the flow of coolant through the radiator. A malfunctioning thermostat may either not open properly, causing overheating, or fail to close, leading to inefficient cooling. If the engine temperature fluctuates or stays consistently high, the thermostat may be a potential culprit.

Broken or Damaged Radiator Fan:

The radiator fan helps cool the radiator by drawing air through its fins. A malfunctioning or broken fan can result in inadequate cooling, leading to overheating. Issues with the fan may include a failed motor, damaged blades, or electrical problems.

Radiator Cap Issues:

The radiator cap maintains pressure within the cooling system. A worn or faulty cap can result in coolant loss, overheating, or air entering the system. Regularly inspect the radiator cap for wear and replace it if necessary.

Fins Damage:

The thin fins on the radiator help dissipate heat. Damage to these fins, whether due to debris impact or corrosion, can reduce the radiator’s efficiency. Gently straightening bent fins can sometimes improve airflow, but severe damage may require radiator replacement.

Radiator Hose Problems:

The hoses connecting the radiator to the engine can deteriorate over time, leading to leaks. Check for visible signs of wear, cracking, or bulging in the hoses, and replace them if needed.

Regular maintenance, such as checking coolant levels, inspecting hoses, and performing radiator flushes, can help prevent some of these issues. If you notice any signs of radiator problems, it’s essential to address them promptly to prevent engine overheating and potential damage

Common Causes of Car Paint Damage

Understanding the common causes of car paint damage is not just about preserving your car’s exterior. It’s about protecting your investment and maintaining your vehicle’s appearance and value. Here are some typical issues and tips on how to fix them.

  1. Road Debris and Rocks
    One of the most common causes of paint damage is road debris, such as small rocks, gravel, and sand. When vehicles kick up these materials, they can strike your paint surface, causing chips and scratches.

    Preventive Tip: Maintain a safe distance from other vehicles, especially on gravel roads, and consider applying a protective film or ceramic coating to vulnerable areas.

  2. Bird Droppings

    Bird droppings contain acids that can quickly etch into your car’s paint if left unattended. The longer bird droppings sit on the surface, the more damage they can cause.

    Preventive Tip: Remove bird droppings promptly with a gentle car wash solution and avoid parking under trees where birds commonly roost.

  3. Tree Sap and Resin

    Parking under trees may provide shade but can expose your car’s paint to tree sap and resin, which are sticky and challenging to remove. These substances can also damage the paint finish over time.

    Preventive Tip: Avoid parking under trees for extended periods, especially during spring and summer when trees are actively producing sap.

  4. Improper Washing Techniques

    Using abrasive sponges, brushes, or harsh cleaning chemicals during car washing can scratch the paint and remove protective wax coatings, leaving the paint vulnerable to damage.

    Preventive Tip: Use soft microfiber towels, a pH-balanced car wash soap, and the two-bucket washing method to minimize swirl marks and scratches.

  5. Automatic Car Washes with Brushes

    Automatic car washes equipped with abrasive brushes can cause scratches and swirl marks on the paint surface, especially if the brushes are not adequately maintained.
    Preventive Tip: Opt for touchless or brushless automatic car washes that use high-pressure water jets instead of physical brushes.

  6. Sunlight and UV Exposure

    Excessive exposure to sunlight and UV rays can cause the paint to fade, oxidize, and lose its gloss over time. This is especially true for cars parked outdoors regularly.

    Preventive Tip: Park your car in shaded areas whenever possible or use a car cover to protect it from direct sunlight.

  7. Salt and Road Chemicals

    Salt used for de-icing roads during winter can accelerate corrosion and paint damage, especially on the lower panels of the vehicle.

    Preventive Tip: Wash your car regularly during winter months to remove salt and road chemicals from the paint surface and undercarriage.

  8. Accidental Scratches and Dents

    Everyday incidents such as parking lot dings, scratches from keys or objects, and minor collisions can lead to paint damage if addressed.

Signs of a failing AC Compressor

The AC compressor is one of the most essential parts of your car’s air conditioning system. It’s responsible for pumping refrigerant through the AC, helping to cool the air that blows through your vents. When the compressor starts to fail, it can affect how well your AC works, especially on hot days. Here are some signs to watch out for if your AC compressor is having trouble.

First, if you notice warm air coming out of the vents instead of cold air, that’s a big clue that something’s wrong. The AC compressor might be unable to move the refrigerant properly, so the air inside the car won’t cool down.

Another sign is strange noises when you turn on the AC. The compressor has moving parts inside, and if those parts wear out or break, you might hear grinding, rattling, or squealing sounds. These noises usually mean the compressor is struggling and could stop working soon.

You may also see your AC turning on and off more frequently than usual. This is called “short cycling.” When the compressor can’t maintain steady pressure, it forces the AC to cycle on and off quickly, which is terrible for both the compressor and the overall AC system.

Leaks are another thing to look out for. Sometimes, refrigerant or oil can leak from the compressor, making it less efficient. If you spot puddles under your car or notice that the AC isn’t cooling as well as it used to, a leak could be the problem.

Finally, if your car’s engine works harder than usual when the AC is on, that’s another clue. A failing compressor can put extra strain on the engine, making it feel sluggish or causing the car to use more fuel.

10 Mistakes to Avoid on a Road Trip

There’s something liberating about heading out on the open road.  spend the afternoon picnicking at an overlook, or cruise through the night fueled by gas station coffee and snacks. All you need is a reliable car, a killer playlist, and a plan that’s flexible enough to allow for a little wiggle room — because that’s where the fun comes in.

But even the most go-with-the-flow road tripper knows that without some solid pre-trip planning and smart on-the-road know-how, the most amazing road trip can be a bust. To help, we chatted with a few experts who know what you’ll need to do (and not do) in order to make your road trip seamless.

1. Not Taking Your Car in for a Full Tune-up Before Departing

On a long road trip, your car can either be your best friend or your worst enemy. To increase your chances of the former, schedule a full tune-up a week or two before you go. Having a pro check your oil and tire pressure, and make sure your battery, brakes, and engine are working properly, will keep you from being stranded on the side of the road or calling AAA for a tow just a few hours in.

2 Leaving Without Getting Your Home in Order

Sanna Boman, editor-in-chief at Roadtrippers, told Travel + Leisure by email that she recommends making “a list of the things that need taking care of when you’re gone, including your mail, lawn and garden, and house plants.” If you’re worried about leaving the house empty for multiple days (or weeks), she said, “Installing a home security system before you leave can offer peace of mind.”

3. Forgetting to Download Maps, Entertainment, and Road Trip Apps

If you want to avoid data charges at the end of your trip, you’ll need to download everything over Wi-Fi before you leave. Andrew Moore-Crispin, director of content at Ting Mobile, recommends downloading your maps on Google Maps in advance, so you don’t have to use data (or need it) to navigate. The same goes for Spotify playlists and any shows or movies you’ll need to keep young road trippers entertained. “Apps like Netflix, Spotify, and Facebook all see upticks through extensive usage. Control your data in the app’s setting. You can set how much data the app can use, and you can prevent photos from loading in your feed until you’re on Wi-Fi,” he said.

In addition to recommending their Roadtrippers planning app, Boman suggests road trippers download Waze for real-time traffic updates, GasBuddy for finding gas and comparing prices, and Recreation.gov for managing your campground reservations.

4. Overlooking the Tech Accessories You Need to Stay Online and in Control

Pack your car phone charger (or upgrade to this multi-phone car charger), and make sure to have a place to put your phone, so you can check the directions without fumbling or looking down. This universal magnetic car mount from WizGear hooks into your car’s air vent to keep your phone in view at all times — and it’s less than $10.

5. Leaving Home Without a Cooler of Snacks and Drinks

Chances are, there are plenty of gas stations and fast food joints along the way, but a trip sustained by burgers, fries, candy, and chips will get old fast. Pack a cooler with pre-cut veggies and fruit, nuts, sandwiches, and of course, some healthy snacks. To keep you hydrated and lightly caffeinated on a long day.

6. Not Keeping Things Organized and Clean During the Trip

When you’re living in your car, things can get messy quickly. Bring along wet wipes, paper towels, and hand sanitizer, and stow everything in a seat back organizer (this one has a trash compartment, tissue holder, and a place to stow water bottles or wipes). When packing the car, load things you won’t need until later first, so the items you’ll use throughout the drive are more accessible.

7. Planning Everything so There’s No Room for Spontaneity

One of the best parts of road tripping is having the freedom to stop, explore, and reroute at any moment. “Once you plan out your trip, you can always deviate from your plan, but it’s a good idea to do some research ahead of time to get the most out of your trip,” said Boman. “Road trips are all about the journey — of course, time or budget constraints can dictate the route, but detours and unexpected stops are often the most memorable moments from a trip.”

8. Not Stopping to Stretch Your Legs Often Enough

If you have a final destination in mind, it may be tempting to drive straight through, but if you do, you’ll miss everything that makes a road trip fun. Side trips and highway attractions are a big part of road tripping — you never know when you’ll come across an Airbnb that’s shaped like a giant beagle or pass a beautiful hike that’s right off the road.

“When hitting the road, the biggest mistake that people make is not stopping often enough to stretch their legs and walk. To keep your mind fresh to focus on driving safely, I recommend stopping once an hour to move around and stretch, whether that means getting gas or grabbing a cup of coffee, then enjoying a 30-minute break every four to five hours for a short walk or hike,” said Dr. Suzanne Bartlett-Hackenmiller, an integrative medicine physician and the medical advisor for AllTrails. “According to the Journal of Safety Research, 30 minutes is sufficient to help fight against fatigue during longer trips.”

9. Driving Without the Gear (or Know-how) to Change a Flat Tire

Not every car (or rental car) comes with a spare tire kit. Take the time to make sure you have a fully inflated spare and everything you’d need to put it on — a jack, lug wrench, and the owner’s manual. If you don’t have a spare tire, buy one (and the necessary tools) before taking off. You should also get a little tutorial (either in person or online) on how to change a flat tire should something come up. There’s nothing fun about relying on a Google search when you’re in the middle of nowhere.

10. Leaving Home Without a Road Trip Emergency Kit

Don’t leave home without preparing for some common road trip mishaps. A flashlight with extra batteries, a tire pressure gauge, jumper cables, a car battery charger (or spare battery), extra water, a few energy bars, and some first-aid essentials — pain reliever, bandages, and scissors — will go a long way should something go awry.

How to Prevent Car Rust

As you can see, rust on a car can be a very serious issue. This is why it’s so important to learn how to prevent car rust. Luckily, keeping your vehicle rust-free is pretty easy. Start with these five tips.

1. Wash Your Car Frequently

One of the easiest ways to prevent rust on a car is to wash it often. Not only will it keep your car looking shiny and new, but it will also remove corrosive debris, salt, and grime.

It’s important not to wait for your car to look dirty before washing it. The elements that attack your car’s paint aren’t visible to the naked eye, so by the time you can see that you’re due for a wash, some damage has already occurred.

While any type of car wash is better than not washing your car at all, a high-pressure cleaner is the most effective. This will allow you to easily clean tricky areas – like your undercarriage and the inside of your wheel arches. For the best protection, plan to wash your vehicle once a week and have it professionally cleaned every few months.

2. Don’t Forget the Wax

To keep your car in the best possible condition and prevent rust from forming, you’ll want to wax it at least twice a year. This adds another layer of protection between your car’s paint and rust-causing moisture. If you’re not storing your car in a garage, you’ll need to wax it even more often to make up for the extra exposure to the elements.

It’s easy to wax your car on your own, but if you don’t have the time, consider adding a hand wax when you take it for professional cleaning.

3. Apply a Rust Coating

If you’re already having problems with rust or you live in a harsh environment, it’s a good idea to have a protective rust-proof coating applied by a professional. Since exposure to salt is one of the primary causes of rust, this is even more important if you live by the ocean or the gulf. In areas where salt is frequently applied to icy roads, rustproofing can also make a major difference.

If you have a short-term lease or don’t plan to keep your car for long, then you can probably skip the rustproofing. However, if you plan to hold onto your vehicle for the long haul, this is definitely worth considering.

4. Protect Your Car from the Elements

Constant exposure to sun, rain, and snow can do a number on your car. If you want to avoid rust, you really should park it under cover. If your home doesn’t already have a garage, consider adding one. A portable garage is an affordable option that’s ideal for those who rent their homes, on a tight budget, or don’t have a lot of space. A steel garage is an excellent option for a homeowner who has room to spare, is looking for a permanent option, and wants to save money on a new structure.

5. Repair Rust Before It Spreads

It’s a good idea to give your car a once-over each time you wash it. Keep an eye out for any paint damage or small spots of rust. When checking your car, also pay close attention to the condition of drain holes, water channels, and seals. If moisture collects here, rust can start to form unseen.

Any time you notice a possible sign of rust, it’s important not to let it go. Taking care of it before it spreads can save you a lot of time and thousands of dollars in future repairs.

12 Reasons Why Your Car Won’t Start

It’s one of the worst things that can happen to a driver. You turn the key in your car’s ignition, perhaps hear a few alarming noises and then nothing. Whether in the parking lot after dinner, in your driveway before work, or at the rest stop after you’ve stopped for snacks, there’s never really a good time for your car to not start. It’s usually indicative that your car needs some kind of repair, and even when no repairs are needed, you have a serious logistical challenge on your hands.

What to do if your car won’t start

When your car breaks down and you’re on a busy road, this can be a scary experience. If you don’t have an emergency kit in your car, there are a few things to do to fix the situation. First, call roadside assistance to get you and your car to a safe location (preferably an auto shop). Then, you or the mechanic will need to figure out why it’s not starting. Here are a number of reasons why your car won’t start:

1. Bad or dead battery

The most common reason cars don’t start is a dead or faulty battery. Even though most cars run on gasoline, they all require electrical power to function. The starter that cranks your engine to start requires an electrical signal to fire. If something’s wrong with your battery, your car engine won’t turn over. There are other symptoms that may indicate a dead battery, but checking whether your engine turns over at all is a good first step.

The good thing about dead batteries is that you don’t always need a professional to get your car going again. Jumping a car battery is typically fairly straight-forward, as long as you have jumper cables and another power source.  However, a battery jump may just be a temporary solution, and new batteries can be expensive, so it’s best to always take good care of your battery. For more on how to do that, check out these tips for avoiding a dead battery.

2. Bad alternator

A bad alternator goes hand-in-hand with a dead battery. The alternator recharges the battery and keeps the car’s electrical systems running after the car has started. If you have a bad alternator, you don’t necessarily have a bad battery, but you certainly might not have a functioning one. Any bad alternator should be replaced, so be sure to look out for any signs of a bad alternator.

3. Faulty starter motor

Dead batteries or alternators aren’t the only things that can stop your ignition from functioning. If something is wrong with the starter motor that receives the electrical signal to crank the engine, your car may not respond to the turn of your key.

Common symptoms

One of the easiest ways to tell if your starter motor has a problem is to check whether your lights come on when you turn your key in the ignition. Turning your key turns your battery on, so if you’ve turned your key all the way and the lights come on but the engine doesn’t turn over or click, your starter motor could be the culprit. Any signs of electrical failure could also indicate that the starter motor needs help. Repeatedly trying to use a starter motor that has been subject to a blown fuse could cause it to overheat and emit smoke. 

4. Bad ignition switch

The ignition switch is another step on the road that leads from turning your key to starting your engine. It plays a crucial role between your battery and starter motor, carrying power from the battery to the engine.

Common symptoms of a bad ignition switch

If you have a bad ignition switch, you won’t hear the starter motor working to start the engine. You also might experience some electrical issues, since the ignition switch effectively activates your car’s main electrical systems. Flickering or dying dashboard lights are a prime example. You may also have difficulty turning your key in the first place.

5. Bad spark plugs

If your car doesn’t start, it’s possible that its spark plugs are old or dirty. Spark plugs that have become defective in any way can lead to reduced gas mileage, lack of acceleration, engine troubles such as misfires, and difficulty starting your car.

6. Broken distributor cap

It’s not necessarily the spark plugs’ fault. The distributor cap routes power from the engine’s ignition coil to the spark plugs. Broken or malfunctioning distributor caps can cause your engine to misfire, activate the check engine light, cause strange noises and, of course, prevent your car from starting.Make sure there is no moisture under the cap and replace it immediately if it’s broken. When in doubt of how to do this safely, it’s best to rely on a professional.

7. Bad timing belt

Your timing belt is another component that is integral to a functioning engine. The timing belt rotates the engine’s cam and crankshaft in unison, causing the cylinders to fire at the appropriate times.

Common symptoms of a bad timing belt

If something is wrong with your timing belt, you may hear ticking noises from your engine or strange disparities in your engine’s revving, or your engine may not turn over. Replacing your timing belt is a piece of maintenance that needs to be performed on a semi-regular basis, so if you notice any issues that could be tied to it, don’t hesitate to call your mechanic.

8. Jammed steering lock

Ever gotten into your car and found that you can’t even turn your key? If you’ve experienced this, it’s likely that your steering lock is jammed. As an anti-theft measure, your steering lock activates when someone tries to move the wheel while the key is not inserted in the ignition. It can occasionally serve as an anti-driver measure by accident.

If your steering lock jams, try to wiggle it left and right and then gently turn it in whichever direction allows some movement. Once the lock is unjammed, you can turn the key in the ignition normally.

9. Clogged fuel filter

If fuel can’t reach your engine, your car is going to have a difficult time burning it. As obvious as that sounds, you might not realize that the fuel filter is preventing your car from starting.

Common symptoms of a clogged fuel filter

You may notice an array of fuel-related troubles, ranging from sputtering to poor gas mileage and, of course, difficulty starting. Your fuel filter should be replaced every 30,000 miles, so if yours is coming up on that milestone and your car doesn’t start, it’s worth checking and replacing.

10. Empty fuel tank

No one wants to run out of gas, but if you do, the silver lining is that there isn’t anything wrong with your car. If your tank is empty, your best bet is to get a gas can and give your car the couple of gallons it needs to start and get to a gas station. Another reason for car troubles could be that the gas in your car simply went bad.

11. Electrical issues

If your car isn’t starting, this could be from issues with the fuse box, battery cables or even the body control unit. Sometimes rodents can even get underneath the hood of your car and chew the wiring.

12. Faulty immobilizer

If you try to unlock your car with your key fob and it doesn’t work, this  may mean there’s a problem with the engine immobilizer. This can also cause a problem starting your car if the fob is unable to send a security code to the engine immobilizer.

Knowing why your car won’t turn on is a good first step toward repairing it, but sticking to a car maintenance schedule can help prevent issues from arising in the first place. Learn how to prepare so your car not starting or breaking down is less likely.

How to keep your car from overheating

Overheating poses a risk to both you and your car, so it’s best to avoid that situation in the first place. From preventative maintenance to tricks you can use in a pinch, there are many ways to help your car stay cool. Here are some of the easiest ways to do it:

  1. Check your temperature gauge – You’ve probably looked at your car’s temperature gauge countless times without taking much notice, but it’s there for a reason! If you ever see the needle point towards the red portion of the dial, that’s a sure sign it’s time to pull over and give your engine a chance to cool off.
  1. Turn on the heat – You read that right, turning on the heat really can help cool off your engine in a pinch. Doing this pulls hot air out of your engine compartment, ultimately cooling your engine. It’s not an ideal solution for you or your passengers, but worth keeping in mind for long drives on hot days.
  1. Add engine coolant – Coolant is the fluid that helps keep your engine from overheating, located in the coolant reservoir under your car’s hood. If temperatures are rising, it’s always a good idea to check your coolant level, indicated by lines on the side of the reservoir. If you’re low, you can add extra coolant yourself, although you should always be careful not to do so if your engine is hot.
  1. Have a mechanic flush your radiator – Just like oil, coolant becomes dirty over time and needs replacing. A mechanic can do this for you in a procedure called a radiator flush, where the old coolant is drained, the radiator is flushed with a cleaning fluid, and new coolant is added. Check your owner’s manual for specifics on how often your vehicle needs this done.
  1. Consider replacing your car’s battery – The less power there is in your battery, the harder your car has to work, putting it at risk of overheating. This may begin to occur if your battery is older than 3 years. Your mechanic can advise you on whether your battery is ready to be replaced. Find out when to change your car battery.
  1. Check the drive belt – Coolant circulates within your car’s engine thanks in part to the drive belt. If your drive belt isn’t functioning properly, there’s a good chance your engine could overheat.
  1. Check the brakes – Ever heard of sticking brakes? Brakes might not be the first place you’d think to look if your engine overheats, but stuck brake calipers can create enough extra drag on your engine to eventually generate a lot of heat. If your mechanic can’t find anything wrong with your engine itself, ask them to take a look at your brakes.
  1. Add engine oil – Coolant doesn’t turn down the temperature all on its own! Engine oil is also responsible for removing excess heat, so if your oil levels dip, your engine temperature may rise enough to cause overheating.
  1. Check the vehicle’s thermostat – Your engine regulates its temperature using an internal thermostat, a valve that controls the flow of coolant. If the thermostat malfunctions, insufficient coolant in your engine can cause overheating.
  1. Get professional maintenance regularly – Many of the issues we’ve just covered can be caught early and prevented by routine maintenance. Have a professional mechanic service your vehicle annually and overheating will be far less likely.