When To Change Gear Oil in Car?

As vehicle owners, we often pay close attention to engine oil changes but overlook the importance of maintaining the gear oil in our vehicles.

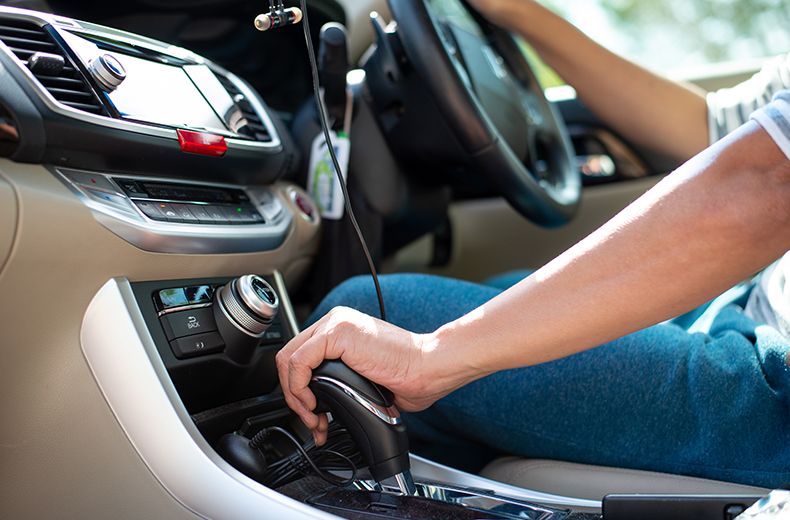
Gear oil works to ensure smooth gear shifting, reducing friction, and protecting the internal components of the transmission system.

However, like any other lubricant, gear oil deteriorates over time and requires periodic replacement.

In this blog post, we will explore when to change gear oil, the signs that indicate it needs to be replaced, the consequences of neglecting gear oil maintenance, the lifespan of gear oil, and how often you should replace it.

Signs that Indicate Changing Gear Oil

Several signs suggest that it’s time to change the gear oil in your vehicle. Pay attention to the following indicators:

1) Stiff Gears

If you experience resistance or difficulty when shifting gears, it may be due to dirty or degraded gear oil. The oil’s viscosity can change over time, leading to poor gear engagement and gear shifting issues.

2) Noisy Transmission

Unusual noises, such as grinding or whining sounds, during gear shifting, can be a sign of insufficient or contaminated gear oil. The lack of proper lubrication causes increased friction between the gears, resulting in these noises.

3) Gear Slippage

When the gear oil becomes old and contaminated, it loses its ability to maintain the required friction between the gears. This can cause gear slippage, where the transmission slips out of gear unexpectedly or struggles to stay engaged.

4) Burning Smell

If you notice a burning smell coming from your transmission, it could be an indication of overheated gear oil. Overheating can occur due to excessive friction caused by degraded or inadequate gear oil, potentially leading to gearbox damage.

5) Leaks and Oil Contamination

Inspect your vehicle for any signs of oil leaks around the transmission area. Leaking gear oil not only reduces the lubrication level but also allows contaminants to enter the transmission system, accelerating wear and tear.

How To Check the Gearbox Oil Level?

If your vehicle has a dipstick, follow these steps:

  • Remove the dipstick from its housing.
  • Wipe the dipstick clean with a lint-free cloth.
  • Reinsert the dipstick fully into its housing.
  • Remove the dipstick again and observe the oil level. There may be “Min” and “Max” marks or other indicators on the dipstick. The oil level should ideally be between these marks.

If your vehicle uses a fill plug instead of a dipstick, you will typically need to remove the fill plug and check that the oil level is at the bottom of the fill hole.

What happens if the gear oil is not changed?

Neglecting gear oil maintenance can have several detrimental effects on your vehicle’s gearbox system:

  1. Increased Friction and Wear: As gear oil ages, it loses its lubricating properties, resulting in increased friction between the gears. This friction leads to excessive wear on the gears, bearings, and synchronizers, potentially causing irreversible damage.
  2. Reduced Fuel Efficiency: Contaminated or deteriorated gear oil creates more resistance between the moving components, causing increased energy consumption. This, in turn, reduces fuel efficiency and increases your vehicle’s operating costs.
  3. Transmission Overheating: Gear oil not only lubricates but also cools the transmission system. When the oil becomes old and ineffective, it fails to dissipate heat properly, leading to excessive transmission temperatures. Overheating can cause accelerated wear, seal failure, and even transmission failure.
  4. Costly Repairs: Ignoring gear oil changes can eventually result in significant transmission damage. Repairing or replacing a damaged transmission can be an expensive and time-consuming process, often requiring professional expertise.

4 Upgrades To Improve Your Car’s Acceleration

Are you looking for ways to maximize the performance of your vehicle? You’ve come to the right place! We’ll explain some simple but effective upgrades you can make to your car’s acceleration, from the spark plugs to the flywheel.

Reduce Your Vehicle’s Weight and Clean It

The first thing any driver should do to boost their vehicle’s speed and performance is to make it lighter. While not necessarily an upgrade, it’s one of the easiest and most effective ways to make your car faster and more agile. When was the last time you cleared out your car and thoroughly cleaned it from top to bottom, inside and out?

Keeping your vehicle light and junk-free is best for its resale value. Decluttering and disposing of unnecessary items is a great start, and there are many other ways to keep your car clean moving forward, like using a detailing spray. Clean cars run better, and cars that run better perform and accelerate better!

New Spark Plugs

The spark plugs are critical to your vehicle’s performance, so replace the stock OEM plugs with new, high-performance ones. They ignite the mixture of fuel and air for combustion. Typical spark plugs last around 100,000 miles, so if your car has more miles than that, it’s probably due for replacement plugs.

High-performance spark plugs allow your car to run smoother, faster, and more efficiently. Plus, they don’t cost much to replace, so installing new spark plugs is a cost-effective upgrade for acceleration.

Replace the OEM Flywheel

Consider updating the clutch for better performance if your vehicle has a manual transmission. A new, high-performance flywheel that will improve your car’s acceleration. The upgraded flywheel transfers engine torque to the transmission and provides smoother clutch engagement. When replacing your OEM flywheel, you can expect a more engaged driving experience with better acceleration and quicker throttle response.

Add a Cold Air Intake

Installing a cold air intake is a surefire way to give your high-performance vehicle a performance boost. A cold air intake helps your car by replacing the hot air entering the engine with colder, denser air. This air has more oxygen, which means a better mixture in the combustion chamber and a boost in power. The better, oxygen-rich air-to-fuel ratio improves gas mileage, as the engine doesn’t have to work as hard. It’s amazing how many performance upgrades double as gas mileage upgrades!

Now you know how to give your vehicle a performance boost! Many of these changes are affordable, so you won’t break the bank to increase your car’s acceleration. If you know your way under the hood, you can do these mods yourself to save money. However, it’s better to let a professional handle these upgrades if you’re unfamiliar with auto mechanics. Good luck boosting your car, and remember to drive safely!

8 Signs and Symptoms of Engine Damage

The engine is the heart of your vehicle, giving your car the necessary power it needs to operate correctly. When the engine is damaged, it will significantly affect your car’s performance. Fortunately, you can save yourself time and money by quickly diagnosing engine problems before they cause more harm to your vehicle. 

1. The Check Engine light turns on.

Dashboard warning lights are your car’s way of alerting you about problems it detects via its On-Board Diagnostics (OBD) system. If your Check Engine Light (CEL) turns on, you should not dismiss it, as ignoring the problem could cause more damage to your engine (and other parts) over time. There are many different things that can trigger a check engine warning light. Some common reasons for a check engine light appearing include:

  • The Oxygen Sensor needs replacing.
  • The Mass-Airflow Sensor is in need of replacement.
  • The catalytic converter is damaged and in need of replacement.
  • The spark plugs are damaged or worn (causing engine misfires).
  • The fuel cap isn’t on tight enough (a very common, easy to fix issue).
  • many other electronic sensor and actuator related issues

2. Your car is making strange noises.

A knocking noise coming from your bonnet is a classic sign of a dying engine. This noise could be caused by wear of damage to your engine’s mechanical parts such as pistons, bearings or other moving parts. If you hear this type of noise, you should take your car to a mechanic as soon as possible to prevent further damage. Ignoring this problem could result in your car breaking down on the side of the road and a much greater repair bill (than catching the problem early).

Other noises you should look out for include popping, spitting and backfiring from your exhaust.


3. The engine is running roughly or inconsistently.

Listen to the sound your engine produces while you are driving. Is it consistent? A struggling engine will often stutter, shake or lose power as the revs increase. A few common solutions for this may be to replace the spark plugs, test / replace your ignition coils, check your fuel pressure, clean your Air Flow Meter or give your engine a tune-up.


4. Your car produces oil patches.

If you notice puddles of oil under your vehicle, this is probably a result of a leak in your engine. As the oil depletes, more friction and will occur in your engine, generating excess heat. Oil leaks are common from engine oil seals, and sump plugs / sump plug washers. This can cause damage to engine components over time. We recommend that you get engine leaks sealed as soon as possible.


5. You can smell odours from inside the car.

The smell of a car’s emissions should never be noticeable from inside the vehicle. If you have a strong exhaust smell, of engine fumes or any other strange odours, this could be a sign of engine damage. Don’t ignore strange engine smells and expect them to go away. Get your vehicle checked so that the problem can be diagnosed.

6. Your car is using more gas than normal.


Increased fuel consumption can often be related to a fault in the way your engine processes fuel. when paired with a visible check engine light and other engine-related symptoms, the problem can be much more serious.

If you notice your car is using more fuel, get it checked and fixed by a professional. This will save you money in the long run.


7. You experience a loss of engine power.

Engines will struggle to run at their usual level if there is an internal problem. Your vehicle may stall, shake at high speeds or struggle with hills. If your engine isn’t working as well as it used to, get it checked by a mechanic.


8. There is smoke coming from your exhaust.


There are several reasons why your exhaust could be producing smoke. The color of the smoke can give you an idea of what is causing the problem.

If the smoke is black, it means that your engine is has incomplete combustion which leads to burning too much fuel. This could be due to:

  • Damaged fuel injectors.
  • Malfunctioning sensors.
  • A damaged air filter.
  • A clogged fuel return line.
  • Mechanical damage in the engine

Grey smoke can mean several different things, making it difficult to diagnose. Possible reasons include:

  • A stuck PCV valve.
  • Problems with your transmission fluid.
  • Excessive oil consumption.

Dark blue smoke means that your engine is burning oil. This is due to oil leaking into your engine’s combustion chamber. This can be caused by:

  • Worn out piston rings.
  • Damaged valve seals.
  • Other worn or damaged engine components.

How To Prepare Your Car For Fall

s it begins to creep into October, you know that colder weather is on its way. This means that it is time to prepare your car for the upcoming Fall and Winter seasons. Your car is negatively impacted by the cold temperatures in many ways.

Treat the Fall season as a time to prepare your car for the harsh chill that Winter brings. Cold weather makes it more difficult for your tires to maintain grip and makes the windshield more defenseless against cracks. What can you do to prepare your vehicle for the drop in temperatures?

Here are 10 Tips to Preparing Your Car For Fall:

1. Check the Belts and Hoses.

Look for cracks, leaks, and wears in the belts and hoses. You want to ensure that there are no signs of splitting, fraying, or glazing. One major problem with faulty belts and hoses is overheating. Although this usually occurs in the Summer, it can occur anytime of the year, including during the colder months. If you notice any problems with these car components, then you should take your vehicle to your local mechanic.

2. Check the Fluid Levels.

It is crucial to replace your car’s fluid levels, as necessary. This would include windshield washer fluids, transmission fluids, coolant, brake fluids, and power steering fluids. All are very important for ensuring that your car runs smoothly. Washer fluid is important for maintaining visibility. Transmission fluid is important for cooling. Coolant regulates the engine’s temperature, while brake fluid serves as a lubricant, preventing corrosion. Power steering fluid is crucial for operating the vehicle.

3. Check the Tires.

Check the tread, inflation, and overall condition of your tires. Rotate your tires, so that your tires wear evenly. Make sure your tire’s contain the appropriate amount of air. Maintaining proper tire pressure is very important, because cold weather causes tires to lose air quickly. Make sure you have the proper tires. This time of year comes with the potential of snow and ice. Consider if you live in a location where you need snow tires.

4. Prepare for the Cold Weather.

Getting stranded on the side of the road any time of the year is not fun. As the weather turns cooler, you especially need to be prepared for a roadside emergency. Be prepared if a situation like this were to occur. Stock your vehicle with the following items:

  • Gloves
  • Ice scraper
  • Blanket
  • First aid kit
  • Jumper cables
  • Flashlight

5. Check the Oil.

Change your oil at the recommended oil change interval. Consult your car’s manual to determine the recommended oil interval, as it may vary by manufacturer and driving habits. It used to be recommended to change your oil every 3,000 miles. However, this has changed due to the construction of modern engines and the use of synthetic oil. If your car has an oil-monitoring system, you can use this device as a guide.

6. Check your Heat.

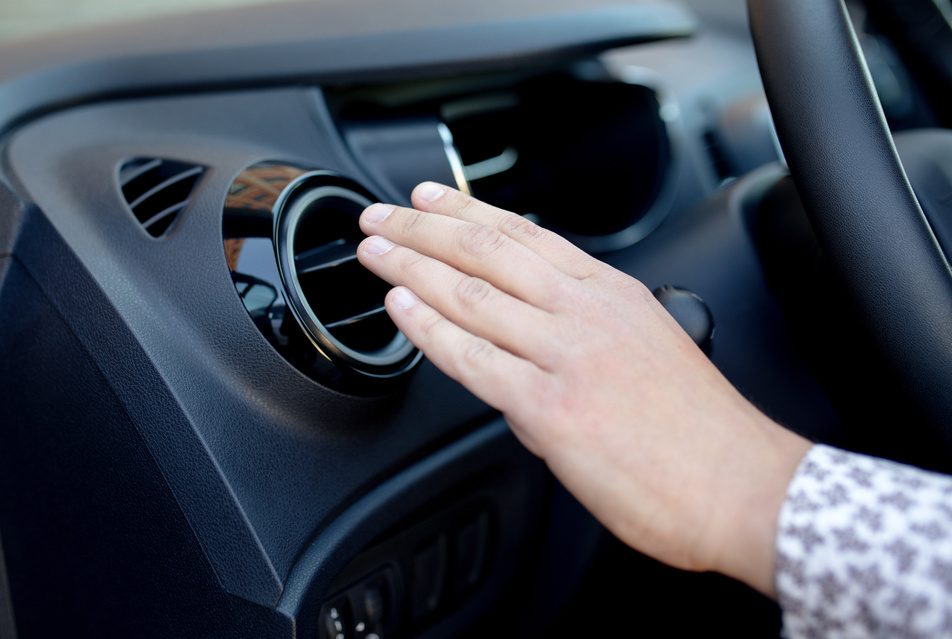
Check to make sure your heat is working properly. You do not want to be without it when cold weather hits. Make sure the defroster works, as well. Driving with a fogged-up windshield is unwise and unsafe. If either of these components are in need of repair, take your vehicle to your local auto repair shop.

7. Check the Brakes.

It is important to get your brakes checked before getting well into the Fall and Winter seasons. Brakes are crucial for safe driving. Cold weather heightens brake problems, since the roads have the potential of becoming slippery from snow and ice. Listen for unusual noises that may point to failing brake pads.

8. Install All-Weather Floor Mats.

Consider investing in all-weather floor mats. These mats are long-lasting to protect your car’s floors against water, snow, dirt, and grime. These mats will even shield your car from stains and spills. They also do a good job for holding up against general wear and tear. You can use them all year long, not just in the colder months.

9. Check the Lights.

Take a walk around the exterior of your vehicle. Check to make sure that all your lights, including headlights, taillights, brake lights, and flashers, are working as they should. If needed, replace a broken or blown-out bulb. These lights ensure that other drivers see you on the road, even in bad weather or other conditions where visibility is low.

10. Check the Battery.

Check the battery for charge and signs of corrosion. You can even take your vehicle to a local auto parts store for diagnosis. Most of the time, this is at no cost to you. If you car needs a new battery, take your car to a mechanic to get your battery replaced. The battery is critical to start your vehicle.

What to do if your car catches fire?

A car on fire is a very dangerous situation as it can create panic among the occupants. Now, Car fire accidents might be due to various reasons, and they can be fatal at times as a car contains a fuel tank, filled with either petrol or diesel, which is a highly-flammable liquid. So, what should you do when your car catches fire? Below are some of the scenarios of car fire hazards and steps you should take if you are involved in any such incidents:

While you are driving the Car

If your car is on fire while driving on the road, then follow the below points to get out of danger:

1. Stop and switch off the ignition

The first thing you need to do if you notice a fire in your car while driving is to stop on the side of the road and turn off the ignition.

2. Get out of the car

The next thing you need to do is to get out of the car as quickly as possible. Try to also assist other occupants in safely getting out of the car. Make sure you unlock all the doors and windows before switching off the ignition.

3. Move away from the burning car

As soon as you get out of the car, move away from the burning vehicle. A car contains flammable liquids, which could result in an explosion. So, maintain a safe distance from the burning car. Also, if possible, alert the oncoming traffic about the danger ahead.

4. Use fire extinguisher

If you have a fire extinguisher, attempt to put out the fire before it gets out of hand. Note that, follow this point only if it is safe to do so. It’s always good to have a fire extinguisher in your car because fire hazards are unpredictable.

5. Do not open the bonnet/boot

When a car is in flames, do not open the bonnet/boot in an attempt to put out the fire. Fire in the engine bay or underneath the car is very dangerous, and if you try to open the boot/bonnet, the flames may flare up and might burn your hands..

6. Contact the fire department and traffic police 

If the fire is getting out of hand, you should immediately contact the fire department, and also notify the traffic police about the same. The traffic police will help in alerting the oncoming traffic about the incident. .

7. Contact the authorized car service center

Contact your car’s authorized service center and notify them about the situation. Explain the magnitude of the damage caused by the fire, and you can also ask for a towing vehicle to transport the damaged car to the nearest service center. .

8. Be aware of the oncoming traffic

Do not stand in the middle of the road. Always stand behind the burning car to avoid being hit by the oncoming traffic. In fact, wave a brightly colored cloth or use an Emergency warning triangle so that you can get help from the passer-byes!

When you see a car on fire!

Imagine you’re a passer-by and you see a car on fire. As a good samaritan here are a few things you can do to help your fellow human!

1. Park your car away from the flaming car

The last thing you need is to have your car getting caught in a chain explosion. Park your car at a safe distance. And then rush to their aid.

2. Use an emergency warning triangle

Use the Emergency warning triangle or the double indicator to let the vehicles behind you know that there’s an accident ahead.

3. Use fire extinguisher

Like in the previous section If you have a fire extinguisher, attempt to put out the fire before it gets out of hand. Note that, follow this point only if it is safe to do so

4. Contact the fire department and traffic police 

As a third party you should immediately contact the fire department and the traffic police about an accident. This is because the people in the burning car might leave their phones and wallets inside in a hurry. Aim to provide assistance. The traffic police will help in alerting the oncoming traffic about the incident.

4 Signs It’s Time to Change Your Antifreeze

If you own a car, you probably know that regular maintenance is crucial to keep it running smoothly and reliably. You probably know when to rotate your tires and hopefully remember to get those oil changes. If you’ve forgotten to change your coolant for a while, look for these four signs. Bring your car in to flush the system before the problems get worse.

1. Warning Lights
 
Car manufacturers know how easy it is to forget maintenance and how difficult it will be to fix your car if your engine overheats too much. Your dashboard should have lights and warnings that come on when your engine overheats, which will mean that your coolant is low or old and not working well.
If your engine temperature runs higher or lower than it should, you should also take a look at your antifreeze levels. Whether the temperature trouble is related to your coolant, or another engine problem like the radiator or fan, you need to get to a mechanic as soon as you can to avoid irreparable damage.
2. Unusual Smells
 
You may notice a sweet scent when you fill or flush your cooling system. Remember what that smells like because if you can smell it as you’re driving, you’re probably overdue for a change. If you can smell the antifreeze, your coolant system has likely sprung a leak somewhere along the line and won’t hold the fluids for much longer. Take your car to the shop before the engine starts having trouble.
When you bring your car in to flush it out, have your mechanic check the rest of the system for leaks, as well as the engine for damage caused by overheating. The cost you have to pay for repairs will be far less than what you’d pay if your engine overheats for prolonged lengths of time.
3. Turnover Trouble
 
You might have trouble starting your vehicle in the winter if your area gets extremely cold, or if you live in a place that experiences extreme summer heat. If you try to use your car one morning only to find it won’t start, check the coolant before looking to other, more expensive fixes.
If you eventually get the car to start, keep an eye on the overflow reservoir over the next few days and see if the level fluctuates. If it does, bring your vehicle to the mechanic and have it flushed so your engine can get back to functioning at full capacity.
4. Color Changes
 
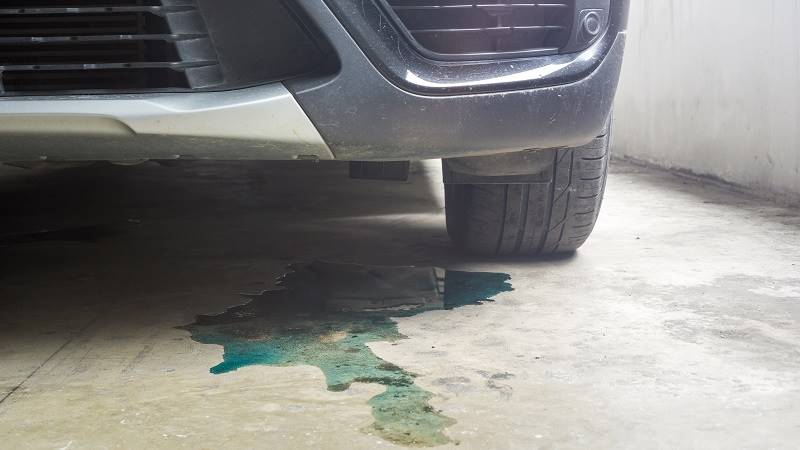
Colors aren’t the most reliable way to see if your antifreeze has expired. However, the shade of the liquid can be a good indication that you’ll need to investigate further. If the fluid looks rusty or has specks floating in it, the coolant has probably outlived its usefulness, and you’ll have to flush the system.

Safety Tips for First-Time School Bus Drivers

Being a school bus driver comes with a lot of responsibility. Afterall, you are charged with safely transporting young children to and from school every day. This is a lot for experienced bus drivers to handle, but it’s even more pressing for first-time drivers.

With a school-bus driver shortage, there are a lot of first-time drivers on routes this school year.


To ensure you are taking the proper precautions, it’s important to follow all safety procedures and tips– especially for first-time school bus drivers who might still be learning their new roles.

Preform Pre-trip Inspections

Before taking the bus out of the lot, ensure that it is prepped and ready for your route. This can include checking the fuel levels, inspecting the tires, and ensuring all mirrors are functioning and in the correct positions. Some operations might provide drivers with a pre-trip checklist to complete before beginning their route.

Get an Up-close Look at Your Surroundings

When on your route, never guess at what’s surrounding the bus, or how much distance is between the bus and an object. School buses are large vehicles and it can be difficult to make certain turns. Before assuming and increasing the risk of getting into an accident, take an up-close look at your surroundings – even if it means getting out of the bus to check.

Know the Equipment in the Bus

Make sure you know what all of the gages and levers are on the bus, and how to use them. It’s also important to know what the various lights and signals on the dashboard mean so you’re prepared in case the vehicle starts to malfunction.

Pay Attention to – and Follow – all Road Signs

Safety should be a driver’s top priority. He or she needs to follow all traffic and road signs. This includes following the speed limit, stopping when required, yielding as needed, and obeying all traffic laws.

Keep Your Eyes on the Road

Drivers need to ensure they are always focused when driving the school bus. This can be difficult when there are dozens of kids talking behind them. It’s key for drivers to be able to block out the noise and keep his or her eyes on the road. This also means cell phones and any other distractions should be avoided while operating the vehicle.

Give Yourself Plenty of Room to Stop

School buses are large, and therefore require more room to come to a complete stop than your personal vehicle. Make sure you give yourself plenty of space between other vehicles, pedestrians and other obstacles when coming to a stop. Practice driving and stopping before beginning your route to ensure you have plenty of time to get used to the tendencies required to operate the vehicle.

Make Sure all Kids Are Off the Bus

Unfortunately, occasionally kids remain on the bus after a driver’s route is completed. To ensure the safety of each child and that he or she gets home safely it’s important for bus drivers to check the bus at the end of each day to ensure all students are off the bus.

Back to School Car Maintenance Tips

With fall right around the corner, students are turning their focus on going back to school. Many of them own cars to get back and forth to campus and even a part-time job, and now is the perfect time for them to perform a few car maintenance tasks that are sure to keep their cars in tip-top shape. Whether they’re simply commuting, or find themselves driving around out-of-state, we’ve got a few tips for students to keep their semester free and clear of car problems.

Basic Maintenance

Right now is the perfect time for students to perform any basic maintenance that may be pending for their cars. Oil changes, tire rotations, and filter replacements should be routine and will help extend the life of the vehicle. Topping off all the fluids – brakes, coolant and transmission – will help the engine to run smoothly and avoid damage. Students should also top off the windshield wiper fluid and check the status of their wiper blades in case they need a replacement – all in the name of good visibility!

Batteries

The easiest way to avoid having battery problems is to keep in mind that batteries have a lifespan between three and five years. Students should keep track of when the battery was initially installed and replace it accordingly. There is nothing more frustrating than getting into a car and finding out it won’t start. A mechanic can routinely check the voltage of the battery with a multimeter.

Check Those Brakes

Faulty or worn down brakes can impede a driver’s ability to come to a quick stop – making an accident more likely. Students can avoid this by having a professional mechanic check the vehicle’s brakes while performing any routine maintenance.

Tread Lightly

Maintaining proper tire pressure is important for several reasons. Poor pressure affects fuel economy and can cause fewer miles per gallon, while wear and tear increases and causes owners to replace their tires sooner than normal. Tires are costly, and a great way to save money is to keep a tire gauge in the car and make it a habit to check the tire pressure once a month.

Turn the Lights on

Failing lights impair a driver’s ability to see the road clearly and in turn makes it more difficult to be seen by other cars. By turning the lights on while the vehicle is in park, owners should walk around the car to make sure the headlights, rear lights, blinkers and hazard lights are working properly. Replacing bulbs is easy and inexpensive and should pose no challenge to a student.

Be Ready for an Emergency

In a perfect world, all of these precautions should minimize the likelihood of unexpected car trouble, but since we all know that’s impossible it’s important for everyone to keep an emergency kit in their car. The emergency kit should contain a pair of gloves, jumper cables, bottled water, a flashlight, a tire repair kit, a first aid kit, a basic tool kit, a hazard triangle, and even a small amount of cash. Many will think this is overkill, but it’s better to be safe than sorry when it comes to a roadside emergency.


5 Tips for Maintaining Your Truck’s Engine Health

As a truck owner, it’s crucial to keep your vehicle in top-notch condition, especially when it comes to the engine. The engine is the heart of your truck, and maintaining its health should be a top priority. Here are five tips that will help you maintain your truck’s engine health and keep it running smoothly for years to come.

Regular Oil Changes

One of the most critical things you can do to maintain your truck’s engine health is to change the oil regularly. Engine oil is responsible for lubricating the engine’s moving parts, and over time, it can break down and become contaminated with dirt and debris. This can cause significant damage to your engine, leading to costly repairs.

To avoid this, you should change your oil every 3,000 to 5,000 miles, depending on your truck’s make and model. Be sure to use high-quality oil and filters to ensure maximum protection for your engine.

Check Fluid Levels

In addition to changing your oil, you should also check your truck’s fluid levels regularly. This includes the coolant, power steering fluid, transmission fluid, and brake fluid. Low levels of any of these fluids can cause significant damage to your engine and other critical components.

To check your fluid levels, consult your truck’s owner manual for guidance on how to access the various reservoirs. Once you have located the reservoir, check the fluid levels and add more if necessary.

Keep Your Engine Clean

A clean engine is a healthy engine. Dirt, debris, and oil build-up can cause significant damage to your engine and reduce its lifespan. Regularly cleaning your engine can help prevent this.

To clean your engine, first, make sure it is cool. Then, cover sensitive parts such as the alternator and distributor with plastic bags or a towel. Next, use a degreaser to break down any built-up grime, followed by a high-pressure washer to remove the debris. Finally, let the engine dry completely before starting it.

Regular Maintenance

Regular maintenance is key to keeping your truck’s engine in top-notch condition. This includes things like changing the air filter, spark plugs, and timing belt. Failing to maintain these critical components can cause significant damage to your engine and other parts of your truck.

Consult your truck’s owner manual for guidance on when to perform these maintenance tasks. If you’re not comfortable performing them yourself, take your truck to a professional mechanic who can do it for you.

Drive Responsibly

Finally, driving responsibly is key to maintaining your truck’s engine health. Aggressive driving, excessive idling, and carrying heavy loads can cause significant wear and tear on your engine, leading to costly repairs and reduced lifespan.

To keep your engine healthy, drive responsibly by avoiding sudden accelerations and decelerations, reducing your speed when carrying heavy loads, and avoiding excessive idling.

In conclusion, maintaining your truck’s engine health requires a combination of regular maintenance, responsible driving, and attention to detail. By following these five tips, you can help ensure that your truck’s engine stays healthy and running smoothly for years to come.

What To Do With A Flooded Vehicle

The introduction of flood-water into your vehicle is never a good thing, but if your vehicle has been in flood waters, there is a list of things you’ll need to know. The first thing is do not start the car, nor should you power the car on with the key. Get the car out of water as quickly as possible, disconnect the battery, and start the recovery process as soon as you can. The longer your car sits in water, especially muddy water or salt water, the greater potential damage to key systems.

If you’re repairing water damage yourself, try the following steps. We advise contacting your insurance company quickly in any flooding situation.

Repairing a Flooded Car, Once Outside of Water

1. Do Not Start the Car

This is key. High water that is up and over the engine compartment means that water has been introduced into the intake tract, and is likely inside any cylinder that had an open intake or exhaust valve. Attempting to start the vehicle at this point will result in hydro-lock, and a damaged engine which otherwise may be repairable.


2. Disconnect the Battery

Disconnect the battery as quickly as possible. In fact, disconnecting the battery BEFORE a flood in anticipation that flooding could happen (like a hurricane) is a good practice. Many electrical items in your vehicle have “constant power” being run to them. Water mixed with electrical current will cause a failure in these components, where otherwise, simply cleaning and drying them can save them.


3. Roll Down The Windows

If possible, roll the windows down. If the windows are electric, open the doors.


4. Look For a High-Water Mark

This will give you an idea of the level of damage. It will usually be clear, especially on the interior. If the water mark is at a low level, below the dash, and water is just in the floor boards, this is the best-case scenario. If the water is up over the dash, then all the electrical components within the dash, and the engine itself have all been penetrated with water.


5. Get Any Residual Water Out Of The Car

If the water level was low enough to not penetrate the dash area, then the car is probably not a total loss. Start by getting the residual water out of the floorboards with a submersible pump and/or shop vac. You can flush these areas with fresh water and vacuum out. Along the buttom of your doors, some vehicles have plastic plugs that can be removed, and several also have these in the floor boards. Remove these plugs to let water out. If the doors have these, remove the door panels and flush the bottom of the doors out with a hose. Once all the water has been removed, you will need to put fans on the vehicle to dry out the interior quickly, or mold will develop.


6. Drain The Engine / Transmission Oil / Change

Regardless if the water level was lower than the engine, it’s best to completely drain and refill the engine oil, transmission oil, and differential fluid as all of these may have water in them.


7. Remove Spark Plugs On High-Water Vehicle

If the vehicle has been in a high-water situation where it’s suspect that the engine’s intake tract was exposed to water, you’re going to want to remove each spark plug.

The vehicle can then be either hand-spun, or cranked to check if any water is present coming out of the spark plug holes. If none is present, then water probably did not make it into the engine. Remove all the piping from the intake tract, and inspect for any mud or dirt indicating flood-water. Rinse the entire intake tract clean.


8. Check fuel system

Siphon out some gas and look for water. Water weighs more than gas, so make sure your siphon is at the bottom of the fuel tank. If you find water mixed with the gas, your tank will need to be dropped and cleaned.


9. Check Other Fluids

Brake, clutch, power steering, coolant reservoirs are sealed on most newer vehicles, but water can seep in.


10. Check Electrical Systems

If key electrical systems are below the water line, they will likely need to be replaced, although some can be flushed, cleaned and left to dry. Checking and troubleshooting flooded electrical will often be the most labor-intensive of all the checks on the vehicle.